Painting wooden furniture is fun until you mess up while applying the polycrylic finish as a topcoat. This is a common problem for people with less knowledge about it. Hence, they often ask how to fix polycrylic problems.
Well, polycrylic finishing surely offers a shiny long-lasting finish. But it often creates streaks and bubbles on the wood surface if not applied properly. As a result, it creates an unsightly look on the furniture. Also, for having a runny consistency, applying polycrylic becomes a bit difficult.
So, fixing such problems is important if you want your furniture to give a luster appearance for a long time. Thus, we have come up with solutions that might help you to do the finishing job more perfectly.
What is Polyacrylic?
Firstly, for your information, polycrylic is not the same as polyurethane. Even though both products serve the same purpose, they differ from each other. Polycrylic is basically an acrylic and water-based formula. Unlike polyurethane, it does not create stinky fumes.
It offers excellent finishing to the interior wooden surfaces, furniture, trims, and cabinets. However, the finishing is not as durable as polyurethane. But polycrylic serves best when your furniture is lightly painted. It does not create a yellow hue after application.
So, surely polycrylic is a great choice. Also, being water-based, it is easier to clean by using soap and warm water.
Types and Sheen Variety of Polycrylic
Basically, polycrylic is available in two forms. They are,
Liquid
Spray
Liquid polycrylic is somewhat milky white in color. But after application, it becomes transparent or crystal clear when dries. However, spray aerosol makes it easy to apply the formula on surfaces.
Again, a variety of sheens are available for polycrylic including ultra-flat, gloss, high-gloss, matte, and satin.
The most faced problems while using polycrylic on wood surfaces are,
Brush stokes or streaks in polycrylic finish
Bubbles in polycrylic finish
Puddles in the finish
Orange peel issue
Runny polycrylic
Crazing Problem
Let’s get to know the reasons and how can you fix them.
Fixing Streaks in Polycrylic Finish
Streaks or brush strokes at the end of the product are very common when you are especially using polycrylic. It mostly happens when you choose the wrong applicator to apply the product. Selection of the wrong brush will surely create brush strokes.
Again, painting in the wrong direction also creates the problem. So, things to do are,
Select the right applicator
Take a high-quality synthetic bristle brush as an applicator. Too hard a brush will leave unsightly strokes. Whereas a synthetic bristle brush will do the applying job very swiftly without leaving strokes.
Apply in the right direction
It is another key to applying polycrylic without expecting any streaks when dries. Dip the brush in the formula and apply it to the direction of the wood grain on the surface. Go for long strokes instead of short strokes to have a better result.
Also, keep applying in one direction. Back-and-forth direction is one of the reasons why it leaves streaks on the surface.
Go for thin coats
Again, applying thin coats of polycrylic is important to avoid such a problem. Thin and even coats will provide a perfect finish. Also, brushing from wet edges toward the dry surface will bring a good result.
There could be several reasons for creating bubbles in polycrylic finish. However, the probable reasons are shaking the polycrylic can or the wrong application method. Sometimes applying the coat during high humidity also results in bubbles in the finish. So, get to the fixing ideas.
Do not shake the can
Shaking the polycrylic can will enable it to trap air inside. Hence, while applying the finish, it creates air bubbles on the surface. consequently, it will make the surface bumpy.
Rather stir the Polycrylic can
To avoid bubbles on the surface, you have to make sure that you are applying a uniform composition. Agitation or stirring can help you get an even formula to apply.
Clean the surface and applicator
Dusty surface and applicator are other reasons for bubbles in polycrylic finishing. So, before applying the coat, make sure the tools and surface are clean.
Do not wipe the applicator on the can side
Wiping the brush along the polycrylic can side will enable it to trap air between the brush fibers. Consequently, it transfers the bubbles to the surface while applying polycrylic.
Tap the Bubbles or Sand the coats
When you notice bubbles while applying the coat, tap on the bubbles. It works when the coating is still wet. After tapping for some moment, the bubbles will flatten.
If the coat is already dry, then sanding out the surface will remove the bubbles. However, you need to reapply the polyacrylic after sanding.
Fixing Puddles in Finish
Puddles take place when the coats are applied before the previous coating is dry. Again, applying thick coats also creates puddles. Fix it maintaining the following ways.
Know the dry time between coats
You must ensure each polycrylic coat dries properly before applying the next coat. Otherwise, it will create puddles. Usually, polycrylic requires around two hours to dry between coats. However, the final coat needs at least 24 hours of curing time before its normal use.
Do not apply thick coats
Thick coats take more time to dry. Also, they do not offer a perfect result. But thin layers work like magic.
Avoid humid weather
Humid weather does not allow the coat to dry in time. As a result, recoating on wet coating forms puddles. Thus, choose sunny weather for doing the job.
Orange Peel Issue
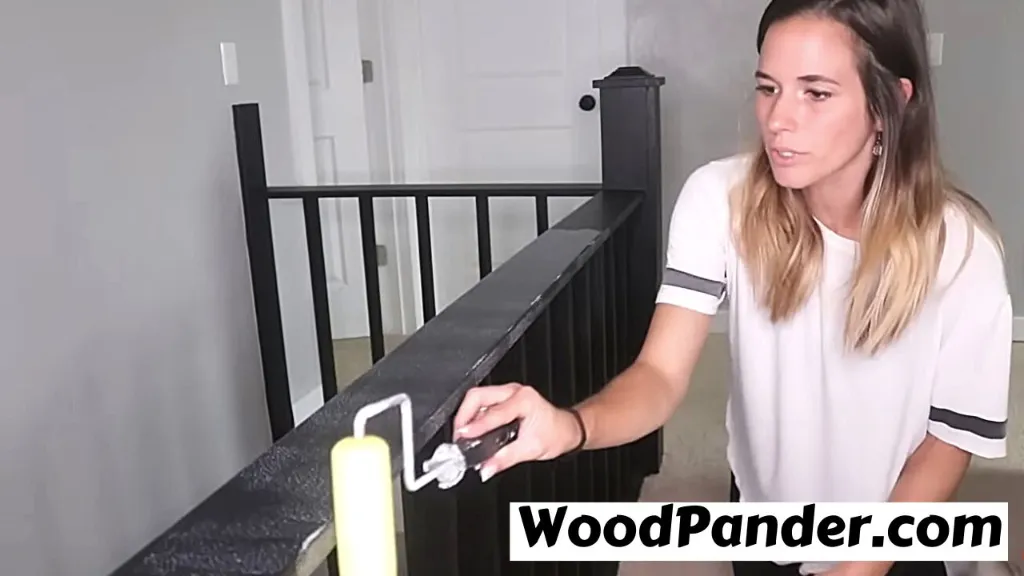
Orange peel on the surface applying polycrylic finish occurs due to using a roller for applying polycrylic.
Do not use a roller
Even though you are using a roller make sure that is napper well and high in quality.
Else, use polycrylic spray
Yes, that can be another solution. Using polycrylic spray does not allow orange peel.
Clean the finish
After applying polycrylic finish, make sure you are cleaning the surface on a regular basis with a dry rag. It will not enable the finish to form an orange peel later.
Runny Polycrylic finish
It happens due to the wrong application method. Also, when the coat is still wet, the running of polycrylic occurs. However, you can fix the problem by,
Following wood grain while applying
The wood grain will hold up to the polycrylic formula very well without letting it run. So, follow the wood grain while applying the compound on the surface.
Remove excess product
After applying polycrylic if it seems extra then remove it. Again, if the coat is already dry then sand out the extra product.
Crazing Problem
This problem is also known as an alligator skin finish. Using old polycrylic is the main reason. So,
Well, sanding is the key. To have a soft and buttery polycrylic finish, sand the surface slightly with 400-grit sandpaper. The result is amazing!
What causes polycrylic to bubble?
There can be many reasons, however, the major ones are dust, uneven compound, adopting the wrong method, or other foreign matters. It also occurs if the working area is not well-ventilated.
How long does it take for polycrylic to cure?
To cure completely, polycrylic takes around a day or 24 hours. However, it depends on the surface and the amount of polycrylic you have applied.
In Conclusion
fixing Polycrylic problems is not as daunting as it may seem. By following the tips and tricks outlined in this guide, you can achieve a smooth and flawless finish on your DIY projects. Remember to properly prepare your surface, use the right tools and materials, and apply the Polycrylic in thin, even coats. If you encounter common issues like brush marks, bubbles, or yellowing, don’t panic. These problems can be easily fixed with a few simple steps.
It’s important to note that prevention is always better than cure when it comes to Polycrylic problems. Take the time to practice on a test surface and learn the correct application techniques before tackling your project. Also, make sure to choose the right type of Polycrylic for your project, as different formulas are designed for specific surfaces and applications.
By following these guidelines and taking the necessary precautions, you can ensure that your Polycrylic projects turn out beautifully. Don’t let Polycrylic problems discourage you from pursuing your DIY dreams. With the right knowledge and approach, you can achieve professional-looking results that you’ll be proud to show off.
I'm a woodwork enthusiast and have loved to do DIY projects since my teenage. Till then, I have learned the 'Art of Wood' to rejuvenate my home interior, plumbing, and fixing. My blog woodpander.com leads information, for woodworking interested guys or just curious to know about woodworks.

")