Even if you try to cover all the way through, it’s not settling with the wood. Well, you’re not the only one facing this problem.
So you may ask, how to dye wood all the way through?
First, you have to select the right dye for the wood. The dye has to easily glide through the layers. Then treat the woods as to make the layers penetrative. Use a paintbrush to dye your wood. Or you can immerse the wood into the dye mixture too. That’s how you can easily dye your wood.
Well, this is just a preview. If you want to know the detailed steps, be with us till the end. Because we have provided the step-by-step guide for dying your wood properly.
So, let’s get started!
Things To Consider Before Dying Your Wood
To properly complete the task, you have to go over two things. These include the type of wood you have and the dye type.
Wood Type
The consistency of the dye colour depends on the wood as well. So, if you want to avoid black dye, pick white wood. Furthermore, sycamore, lime, and beech would work well too.
Then for an ebony outlook, oak, soft mahogany, cherry, or pear are appropriate. Lastly, if you want the dye to penetrate deeply, you must have softwood.
Dye Type
Now, oil-based dyes have a long shelf life. These dyes are highly penetrative. They have the ability to fixate on a specific colour too.
There are a variety of wood dyes available. Some of which are simply stains. Rit dye, among them, is a good choice. It is a great, easy-to-use, inexpensive wood dye.
Furthermore, both of these dyes can go through all the layers of your wood!
Step By Step Guide on How to Dye Wood All the Way Through
Now that you know what elements to pick, let’s jump into the steps. Following the steps will give you full-fledged dying of the wood-
Step 1: Boil the Wood
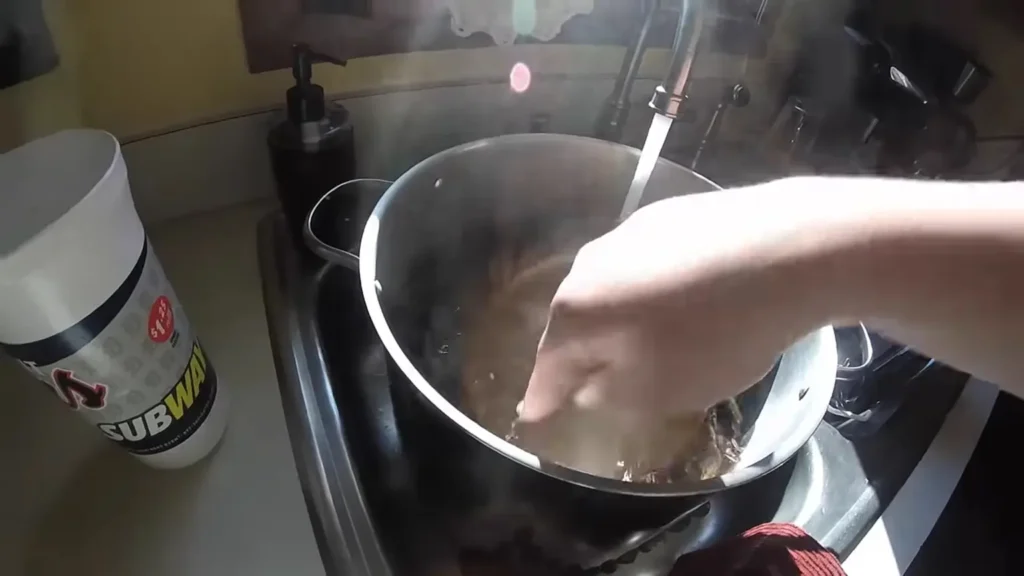
As we have already discussed what type of woods to work on, so get your woods ready. Start preparing your solution where you will boil your wood. You have to set the proportion in a certain ratio regarding your wood’s absorbency.
Take half a pound of Caustic Soda or Lye in a pot. Then, mix the lye with 5 pints of water. Give it a good stirring for 5 minutes so that it blends in well.
Afterwards, we need to dip the wood into the mixture. Try dipping it 2-3 times and let it soak the solution. Bring the wood to a boil for around half an hour. Then, let the wood stay in the solution for 24 hours. This way the wood will soak all the solution into itself.
Step 2: Wipe Off The Solution
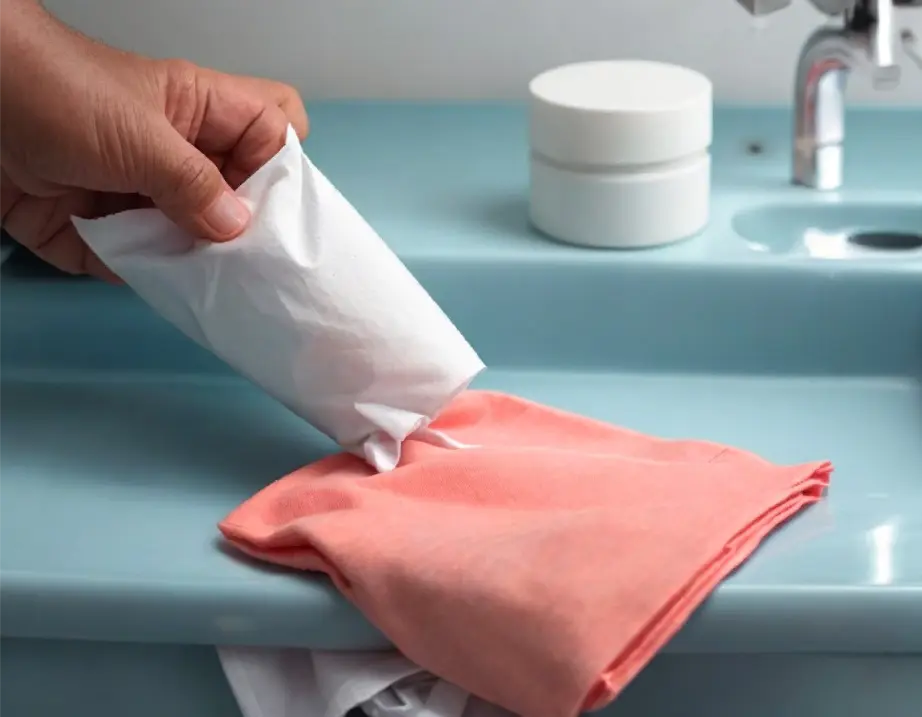
Here comes the part when we will wipe off the solution. You have to keep in mind, The wood has to be as smooth as leather. But also, you have to keep the wood as hard as plastic.
Now for the second step, the wood piece has to be wiped down thoroughly. For that, use clean deal shavings. This is done to eliminate any alkali that might stay on the surface.
Also when wiping down the wood, don’t put too much pressure on it.
Step 3: Pressurize The Wood

In this step, you need to place the piece of wood between two boards like a sandwich. To exert pressure on the woods, an adequate amount of weight should be placed above the boards.
Keep the setup like this until the wood has totally dried off of the soda.
After all of these steps are done, it’s time to dye your wood. However, you might think, why did we do these additional steps?
The wood was given a “soda treatment”. By this treatment, the dye would be able to permeate the entire layer. This treatment has a number of significant outcomes.
That is, it causes the wood to shed the gooey and sticky substances that bind the layers together.
As a result, This treatment will open the pores which will allow the colour to penetrate in.
Now, we’ll be heading to the last step of dyeing the wood.
Step 4: Sand The Wood
Sanding is the initial step in this process. Sand it with a fine-grit sandpaper. Make sure to sand it just enough to avoid a filthy surface.
Don’t sand it down to a rough texture! If the surface is excessively rough, the dye will have a hard time adhering to it. Then use a damp cloth to wipe it away.
Step 5: Dye or Stain The Wood
After sanding the surface, apply an oil-based stain of your choice of colour. You can try brush-on-method.
For this, soak a foam or bristle brush in the dye first. Then brush it evenly over your wood surface. Try to apply the dye in smooth, continuous strokes. If dye splatters on your wood, sand it immediately to remove it.
Another option is the Immersion method. Place the wood carefully in the dye mixture. Allow it to stay for as long as necessary to achieve the desired colour.
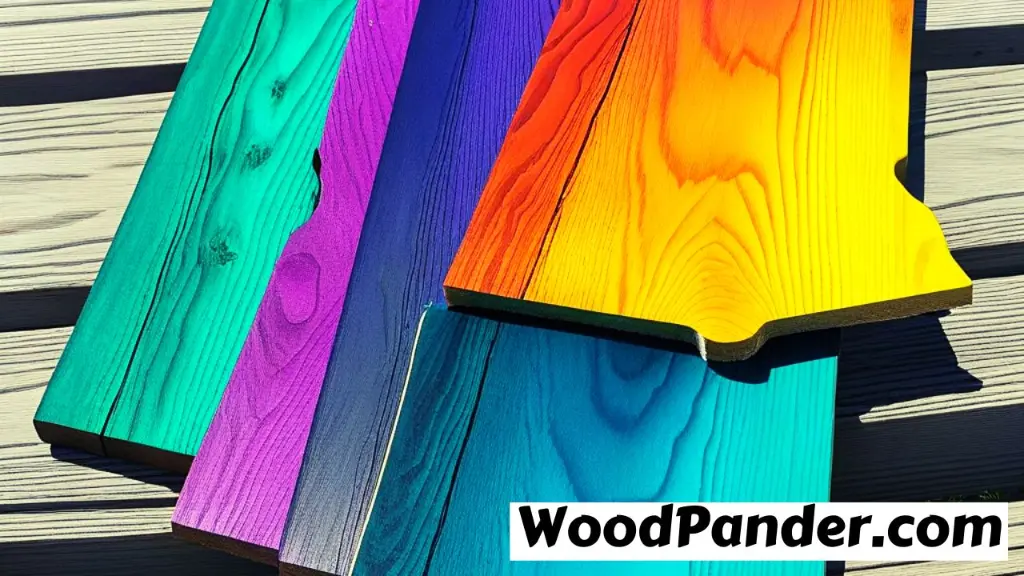
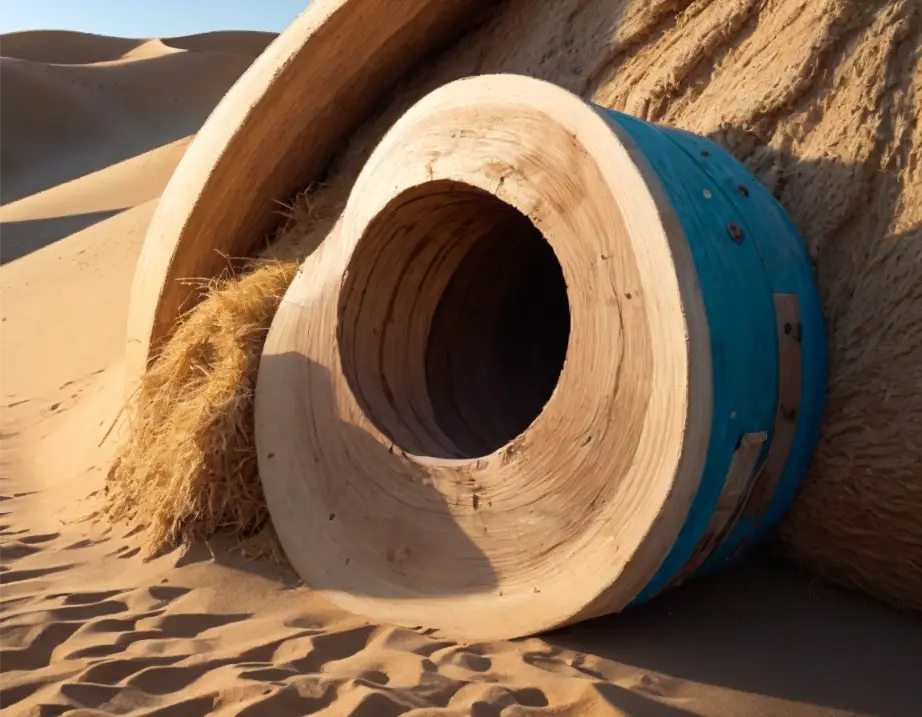
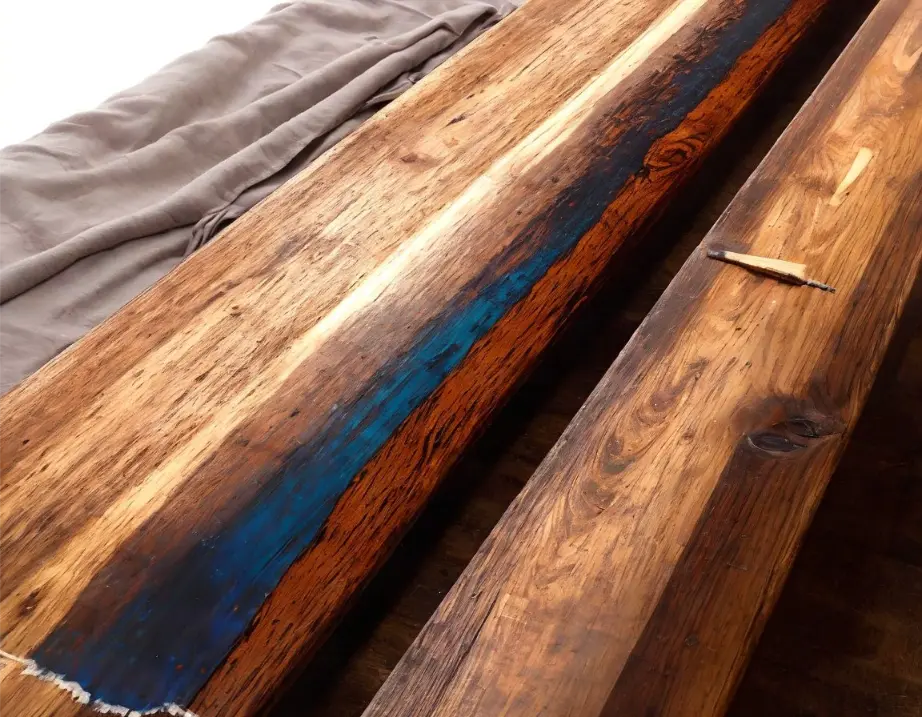
That’s it! Your wood should be coloured from top to bottom.
Vacuum Impregnation Method
Vacuum impregnation is a highly effective technique for achieving deep dyeing in wood.
By creating a vacuum, the wood is able to absorb the dye more thoroughly, resulting in a vibrant and long-lasting color. To perform vacuum impregnation, you will need a vacuum chamber, a vacuum pump, and a dye solution.
First, place the wood in the vacuum chamber and seal it tightly. Next, connect the vacuum pump to the chamber and start the vacuum process. As the pressure decreases, the wood will expand, creating space for the dye to penetrate. Once the desired vacuum level is reached, introduce the dye solution into the chamber.
The vacuum will draw the dye deep into the wood fibers. Finally, release the vacuum and remove the wood from the chamber.
Vacuum impregnation is a reliable method for achieving consistent and thorough dye penetration in wood.
Pressure Impregnation Method
Pressure impregnation is another effective method for dyeing wood all the way through, especially for denser wood types. This technique involves using pressure to force the dye deep into the wood fibers, ensuring thorough and even color penetration.
To perform pressure impregnation, you will need a pressure vessel, a pressure pump, and a dye solution. The wood is placed inside the pressure vessel, and the vessel is sealed tightly. The pressure pump is then used to increase the pressure inside the vessel, creating an environment where the dye can easily penetrate the wood.
The pressure is maintained for a specific duration to allow the dye to fully saturate the wood fibers.
Pressure impregnation is particularly suitable for hardwoods and woods with tight grain structures. It ensures that the dye reaches the innermost layers of the wood, resulting in a vibrant and long-lasting color.
This method is commonly used in industrial settings and provides consistent and reliable results.
Hybrid Impregnation Method
The hybrid impregnation method combines the benefits of both vacuum and pressure impregnation techniques, resulting in a more effective and efficient way to dye wood all the way through. This method offers several advantages over the individual techniques.
Firstly, the hybrid method ensures better color penetration and saturation compared to vacuum impregnation alone. By using pressure in addition to vacuum, the dye is forced deeper into the wood fibers, reaching even the most tightly packed areas. This leads to a more uniform and vibrant color throughout the wood.
Secondly, the hybrid method is faster than pressure impregnation alone. The initial vacuum step helps to remove air and moisture from the wood, allowing the dye to penetrate more easily during the subsequent pressure phase. This saves time and reduces the risk of uneven color fixation.
To perform the hybrid impregnation method, follow these steps:
- Place the wood inside a vacuum chamber and create a vacuum to remove air and moisture.
- Introduce the dye solution into the chamber and allow it to penetrate the wood fibers under vacuum.
- Increase the pressure inside the chamber using a pressure pump, forcing the dye deeper into the wood.
- Maintain the pressure for a specific duration to ensure thorough color saturation.
- Release the pressure and remove the wood from the chamber.
By following these steps, you can achieve excellent color penetration and vibrant results using the hybrid impregnation method.
Finishing and Sealing Techniques
Finishing and sealing the dyed wood is crucial for both protection and durability. Once the wood has been dyed all the way through, applying a finish will help to seal the color and prevent it from fading or wearing off over time.
Additionally, a good finish will provide a protective barrier against moisture, UV rays, and other environmental factors that can damage the wood.
There are several finishing options to choose from, including oil-based finishes, water-based finishes, and shellac. Oil-based finishes offer a rich, deep color and provide excellent protection. Water-based finishes are more environmentally friendly and dry quickly. Shellac is a traditional finish that offers a beautiful, glossy finish.
To apply the chosen finish, start by sanding the wood to a smooth surface. Then, apply the finish using a brush, roller, or spray gun, following the manufacturer’s instructions.
Allow the finish to dry completely between coats, and sand lightly between coats for a smooth finish. Finally, achieve the desired sheen level by applying additional coats or using a wax or polish.
By following these instructions, you can achieve a beautiful and durable finish on your dyed wood.
Best Dye For Wood
The best dye for wood depends on the specific project and desired results, but some of the most popular and well-regarded wood dyes include:
Keda Dye: Keda Dye is a hybrid wood dye that is known for its vibrant colors, deep penetration, and ability to bring out the natural beauty of the wood grain. It is also available in a wide range of colors, making it a versatile choice for a variety of projects.
TransTint Wood Dye: TransTint Wood Dye is another popular choice for staining wood. It is a water-based dye that is easy to apply and dries quickly. It is also available in a wide range of colors, including some unique and exotic shades.
Aniline Dye: Aniline dyes are a traditional type of wood dye that is known for its rich colors and durability. They are also very transparent, so they will not obscure the natural grain of the wood. However, aniline dyes can be more difficult to apply than other types of dyes, and they may require more preparation of the wood surface.
Oil-based Dye: Oil-based dyes are a good choice for projects that will be exposed to high wear and tear, as they are more durable than water-based dyes. They also have a deeper penetration than water-based dyes, so they are less likely to chip or peel.
Solutions for Uneven Color Fixation
If you encounter uneven color fixation when dyeing wood, there are a few solutions you can try.
First, sand the wood lightly to remove any excess dye and even out the color. This will help to create a more uniform appearance. Alternatively, apply a second coat of dye to the areas that appear lighter, allowing it to penetrate further.
This will help to deepen the color and create a more even tone.
Another option is to use a wood conditioner or pre-stain treatment before applying the dye. This can help to promote more even color absorption and prevent blotchiness. By following these solutions, you can achieve a more uniform and professional-looking color on your dyed wood.
Troubleshooting Common Problems
If you encounter any issues while dyeing wood, don’t worry! Troubleshooting common problems is part of the process. One common problem is uneven color fixation. To fix this, try sanding the wood lightly or applying a second coat of dye.
Another problem is blotchiness, which can be prevented by using a wood conditioner or pre-stain treatment. By following these tips, you can overcome common dyeing problems and achieve the desired results.
Related Questions
How to finish Dyed Wood?
First, choose a high-quality clear coat. This will let it last for a very long period. We propose spray-on furniture lacquer or a good hand-applied finish like wiping varnish. After your colour stain coat has dried completely, apply them according to the directions.
How to stain wood all the way through?
You have to apply a moist coat and wipe off the excess before it dries. The stain can be applied with any tool. This includes a rag, brush, paint pad, roller, or spray gun. You can also stain the object by dipping it in the stain. Pouring it on the wood and spreading it around also works to stain wood.
Does oil stain penetrate wood?
Yes, oil wood stain penetrates into the wood. It takes time to absorb the stain. But that gives the oil a higher chance to settle in wood. This type of stain doesn’t peel or flake off. That’s why they have a demand for exterior furniture.
How deep does dye penetrate into wood?
Dye penetration depth depends on the type of dye, wood species, and application method. Generally, alcohol-based dyes penetrate the deepest, followed by water-soluble dyes and oil-based dyes. The depth of penetration can range from a few thousandths of an inch to 1/8 inch or more.
How do you dye finished wood?
Dyeing finished wood requires a different approach than dyeing bare wood. First, you need to remove the existing finish with a chemical stripper or sandpaper. Once the wood is bare, you can apply the dye using a brush, sponge, or rag. Allow the dye to dry completely, then apply a new finish.
What is the best way to color on wood?
The best way to color on wood depends on the desired effect. For a deep, rich color, you can use dye or stain. For a more opaque finish, you can use paint. If you want to highlight the natural grain of the wood, you can use a clear finish.
How long to soak wood in dye?
The soaking time for wood in dye depends on the type of dye and the desired color depth. For water-soluble dyes, soaking times can range from a few minutes to several hours. For oil-based dyes, soaking times can be up to 24 hours.
EndNote
Now you know how to dye wood all the way through. Hopefully, the steps we mentioned will come to your use.
Good luck dying your wood!


")