Wood putty, also known as wood filler, is a pliable material used to repair and conceal imperfections on wooden surfaces. It typically consists of a mixture of finely ground wood particles, binders, and solvents. Wood putty comes in various colors to match different wood tones, allowing for seamless repairs that blend with the surrounding surface.
Does Wood Putty Harden?
| Wood Putty Hardens | |
|---|---|
| Definition | Wood putty is a type of filler used to repair and fill gaps, holes, or cracks in wood surfaces. |
| Hardening Process | Wood putty typically hardens through a chemical reaction or drying process. |
| Chemical Reaction | Some wood putties harden by undergoing a chemical reaction, often with the presence of a catalyst or hardening agent. This reaction causes the putty to cure and solidify. |
| Drying Process | Other wood putties harden through a drying process, where the water or solvent in the putty evaporates, leaving behind a hardened and solid material. |
| Drying Time | The drying time for wood putty varies depending on the type, brand, and environmental conditions. It can range from a few hours to several days. |
| Strength | Once hardened, wood putty can provide a reasonably strong and durable repair. However, it may not be as strong as the original wood material. |
| Sanding and Finishing | After the putty has hardened, it can be sanded and finished to match the surrounding wood surface. This allows for a smooth and seamless repair. |
| Compatibility | Wood putty is compatible with a wide range of wood surfaces, including hardwood, softwood, plywood, and veneers. |
| Usage | Wood putty is commonly used for repairing minor imperfections, filling nail holes, covering small knots, and repairing damaged wood surfaces. |
One of our articles –BCX vs ACX Plywood: Which Is Perfect For You?
Understanding Wood Putty
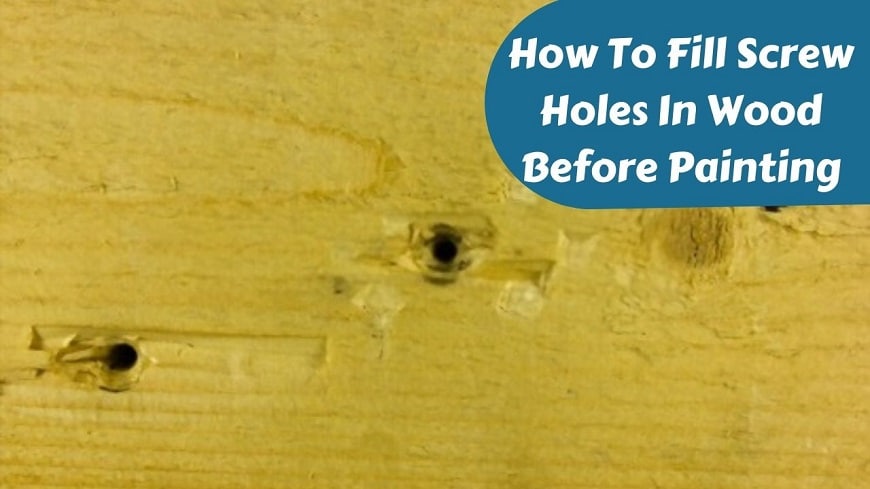
Wood putty serves both practical and aesthetic purposes. It can be used to fill small cracks, nail holes, and dents in wood, creating a smooth and even surface. Additionally, wood putty can improve the overall appearance of woodworking projects by hiding imperfections that may detract from the finished piece.
How Wood Putty Works
Wood putty works by filling voids in wood surfaces, providing a solid foundation for subsequent sanding and finishing. When applied to a damaged area, the putty fills the gaps and adheres to the surrounding wood. This creates a uniform surface that can be sanded, stained, or painted to match the rest of the woodwork.
Types of Wood Putty
There are two primary types of wood putty: oil-based and water-based. Each type has its own advantages and considerations, so let’s take a closer look at each.
Oil-based Wood Putty
Oil-based wood putty is composed of finely ground wood particles suspended in an oil-based binder. It is known for its durability and resistance to shrinking or cracking over time. Oil-based putty is suitable for both interior and exterior use and can withstand weathering and temperature fluctuations.
Water-based Wood Putty
Water-based wood putty, as the name suggests, utilizes water as a carrier for the wood particles and binders. It has a lower VOC (volatile organic compound) content compared to oil-based putty, making it a more environmentally friendly option. Water-based putty is typically easier to clean up and dries faster than its oil-based counterpart.
One of our articles –ECHO CS 800P Vs Stihl 660 Chainsaw: Which One’s Better
Application of Wood Putty
Proper application of wood putty is crucial to achieving a seamless repair. Here’s a step-by-step guide on how to use wood putty effectively:
1. Preparation
Before applying wood putty, ensure that the surface is clean and free from dust, dirt, and debris. Use a soft cloth or brush to remove any loose particles from the area to be repaired. This ensures better adhesion and a smoother finish.
2. Filling the Wood Grain
Take a small amount of wood putty using a putty knife or a similar tool. Press the putty into the crack, hole, or imperfection in the wood, filling it completely. Apply slight pressure to ensure that the putty adheres well and reaches the deeper parts of the damaged area.
3. Sanding and Finishing
Once the putty is applied, allow it to dry according to the manufacturer’s instructions. After it has dried, use fine-grit sandpaper to smooth the surface. Start with a coarser grit and gradually move to finer grits for a polished finish. Sanding not only evens out the repaired area but also helps blend the putty with the surrounding wood.
After sanding, wipe away any dust with a clean cloth or use a vacuum cleaner. Now, the surface is ready for further finishing steps such as staining or painting. Follow the appropriate finishing techniques based on your project requirements to achieve the desired look.
Drying Time of Wood Putty

The drying time of wood putty varies depending on several factors. It’s important to understand these factors to ensure proper drying and hardening of the putty.
1. Factors Affecting Drying Time
The drying time can be influenced by factors such as the type of wood putty, the depth of the repair, temperature, humidity, and ventilation. Oil-based putty tends to have a longer drying time compared to water-based putty. Deeper repairs may also require more time to dry completely.
Temperature and humidity play a significant role in drying time. Warmer temperatures and lower humidity levels facilitate faster drying, while cooler temperatures and higher humidity can extend the drying process. Proper ventilation in the workspace helps expedite drying by allowing moisture to evaporate more efficiently.
2. Tips for Faster Drying
If you’re looking to speed up the drying time of wood putty, here are a few tips:
- Opt for water-based putty: Water-based putty generally dries faster than oil-based putty due to its lower solvent content.
- Use thinner layers: Applying thin layers of putty allows for quicker evaporation of moisture, resulting in faster drying.
- Increase airflow: Use fans or open windows to improve ventilation and promote air circulation around the repaired area.
- Apply heat: Carefully using a hairdryer on low heat or a heat gun at a safe distance can help accelerate the drying process. However, be cautious not to scorch the wood or overheat the putty.
Remember to follow the manufacturer’s instructions regarding drying times and precautions specific to the wood putty you’re using.
Hardening Process of Wood Putty
The hardening process of wood putty is crucial for achieving a durable and long-lasting repair. It involves both chemical reactions and curing time.
1. Chemical Reaction
When wood putty dries, it undergoes a chemical reaction as the solvents evaporate and the binders in the putty form a solid bond. This chemical reaction allows the putty to harden and become sturdy. It’s important to note that the putty may feel dry to the touch before it has completely hardened.
2. Curing Time
Curing time refers to the duration it takes for the putty to fully harden and reach its maximum strength. While the putty may dry and become firm to the touch relatively quickly, it’s essential to allow sufficient curing time for optimal results.
The curing time of wood putty can vary depending on the type of putty and environmental conditions. It’s advisable to consult the manufacturer’s instructions for specific guidelines regarding the recommended curing time. In general, the curing process can take anywhere from several hours to several days.
During the curing period, it’s crucial to avoid subjecting the repaired area to excessive stress or moisture. Prematurely exposing the putty to harsh conditions can compromise its integrity and result in subpar repairs. Patience is key to allowing the putty to fully harden and provide a robust and long-lasting solution.
3. Ensuring Proper Hardening
To ensure the proper hardening of wood putty, follow these essential steps:
- Avoid handling the repaired area until the putty has fully cured. Premature handling can disrupt the hardening process and lead to indentations or damage to the repair.
- Protect the repaired surface from excessive moisture. Moisture can impede the curing process and affect the final hardness of the putty. Take necessary precautions to keep the area dry during the curing period.
- Be mindful of temperature fluctuations. Extreme temperatures can impact the curing process and compromise the integrity of the putty. Maintain a stable and moderate temperature environment during the curing period.
- Allow ample time for the putty to cure before proceeding with any additional steps, such as sanding, staining, or painting. Rushing the process can result in a less durable and visually appealing finish.
By following these recommendations, you can ensure that the wood putty properly hardens and provides a strong, reliable repair that seamlessly blends with the surrounding woodwork.
Limitations and Considerations
While wood putty is a versatile and effective solution for repairing wood surfaces, it’s essential to be aware of its limitations and consider certain factors:
1. Shrinkage
Wood putty, particularly water-based variants, may experience some degree of shrinkage as it dries and hardens. This shrinkage can lead to small cracks or gaps between the putty and the surrounding wood. To minimize shrinkage, it’s advisable to slightly overfill the repaired area and allow for sanding and leveling after drying.
2. Temperature and Humidity
As mentioned earlier, temperature and humidity can significantly affect the drying and hardening process of wood putty. Extreme temperature variations or high humidity levels can impede the proper curing of the putty. Therefore, it’s essential to choose suitable working conditions and adjust drying times accordingly.
3. Stainability and Paintability
Wood putty is primarily used as a means to achieve a seamless repair and improve the appearance of wood surfaces. However, not all types of wood putty are equally suitable for staining or painting. Before applying stain or paint, ensure that the putty you’re using is compatible with your chosen finishing method. Some putties may not accept stain or paint evenly, resulting in a mismatched or blotchy appearance.
Alternative Solutions to Wood Putty
While wood putty is widely used for repairing wood surfaces, there are alternative solutions available depending on the nature and extent of the damage:
1. Wood Fillers
Wood fillers are similar to wood putty but are typically more rigid and suitable for larger repairs. They are often composed of a combination of wood fibers and binders. Wood fillers are particularly useful for filling deep voids or structural repairs where greater strength is required.
2. Epoxy Putty
Epoxy putty is another alternative solution to consider for repairing wood surfaces. It consists of a two-part compound that needs to be mixed together before application. The two components, resin and hardener, react chemically to create a strong and durable bond.
Epoxy putty offers several advantages over traditional wood putty or fillers. Here are some key benefits:
- Superior Strength: Epoxy putty provides exceptional bonding strength, making it suitable for repairing not only small cracks and holes but also larger structural damages. It creates a strong and long-lasting repair that can withstand heavy use and stress.
- Versatility: Epoxy putty is not limited to wood repairs alone. It can be used on various materials such as metal, ceramics, plastic, and concrete, expanding its range of applications.
- Water and Weather Resistance: Epoxy putty exhibits excellent resistance to water, moisture, and weathering. It can be used for both indoor and outdoor repairs without compromising its integrity.
- Enhanced Adhesion: The chemical reaction between the resin and hardener in epoxy putty allows it to adhere tightly to different surfaces, ensuring a secure and reliable bond.
- Sculptability and Moldability: Epoxy putty has a putty-like consistency that can be easily shaped and molded to fit the repair area. This makes it ideal for creating custom shapes or filling irregular gaps.
When using epoxy putty, it’s important to follow the manufacturer’s instructions for proper mixing ratios and application techniques. Once the epoxy putty is applied, allow it to cure according to the specified time frame to ensure optimal hardness and strength.
| Question | Answer |
|---|---|
| Does wood putty harden? | Yes, wood putty does harden and become sturdy. |
| What factors affect hardening? | The type of putty, drying time, temperature, and humidity can impact the hardening process. |
| How long does it take to harden? | The curing time of wood putty can vary, ranging from several hours to several days. |
| Can wood putty be sanded after hardening? | Yes, once the putty has hardened, it can be sanded to achieve a smooth finish. |
| Is wood putty reversible? | Wood putty forms a permanent bond and is not reversible once it has hardened. |
| Can wood putty be used outdoors? | Certain types of wood putty, such as exterior-grade variants, are designed for outdoor use and can withstand moisture and weathering. |
| What are the alternatives to wood putty? | Alternatives include epoxy putty and wood fillers, which offer different strengths and application methods. |
| Does wood putty shrink? | Wood putty, particularly water-based types, may experience some degree of shrinkage as it dries and hardens. |
| Can wood putty be painted or stained? | Yes, once dried and hardened, wood putty can be painted or stained to match the surrounding woodwork. |
| How should wood putty be applied? | Wood putty should be applied to clean, prepared surfaces, filling cracks or holes with a putty knife or similar tool. |
| How can drying time be accelerated? | Using water-based putty, applying thin layers, increasing airflow, and gentle application of heat can help speed up drying time. |
| Does temperature affect hardening? | Extreme temperatures can affect the hardening process of wood putty, so maintaining a moderate and stable temperature is recommended. |
| Can wood putty be used on different types of wood? | Yes, wood putty can be used on various types of wood, including hardwoods, softwoods, and engineered wood. |
| Is wood putty water-resistant? | Depending on the type, wood putty can offer varying degrees of water resistance. Exterior-grade putties are designed to withstand moisture. |
| Can wood putty be sculpted or molded? | Yes, wood putty can be shaped and molded to fit the repair area, making it versatile for different project requirements. |
Related Questions
Can wood putty be used on different types of wood?
Yes, wood putty can be used on various types of wood, including hardwoods, softwoods, and engineered wood. However, the color of the putty should match the wood tone for a seamless repair.
How long does it take for wood putty to dry?
The drying time of wood putty depends on factors such as the type of putty, depth of the repair, temperature, and humidity. It can range from a few hours to several days. Refer to the manufacturer’s instructions for specific drying times.
Can wood putty be sanded and painted after drying?
Yes, once the wood putty has dried and hardened, it can be sanded to achieve a smooth surface. It can also be painted or stained to match the surrounding woodwork.
Can wood putty be used for outdoor projects?
Certain types of wood putty, such as exterior-grade or water-resistant variants, can be used for outdoor projects. These putties are designed to withstand moisture and weathering.
Conclusion
Wood putty is a valuable tool for repairing and concealing imperfections in wood surfaces. It not only fills cracks and holes but also enhances the overall appearance of woodworking projects. Understanding the application process, drying time, and hardening of wood putty is essential to achieve successful repairs.
While wood putty offers effective results, it’s important to consider its limitations, such as shrinkage and compatibility with stains or paints. Additionally, alternative solutions like epoxy putty and wood fillers provide alternative options for more extensive repairs or specific requirements.
By selecting the appropriate type of putty, following proper application techniques, and allowing sufficient drying and curing time, you can achieve professional-looking results and extend the lifespan of your woodwork.

