While making your wooden furniture, you might not achieve your expected finish from Polycyclic. So you may want to give a Polyurethane finish. In that case, now you are wondering, can you put polyurethane over polycrylic?
Yes, You can put both the oil-based and water-based polyurethane over polycrylic. You can directly apply the Polyurethane or first sand the polycrylic before applying it to the furniture. Besides, if you don’t want to keep the polycrylic finish, scrap it off.
However, we know that’s not enough information for you. So, here, we’ll show you the step-by-step instructions to apply Polyurethane over polycrylic furniture. Keep on reading this article!
Types Of Polyurethane: Oil-Based Or Water Based, Which One Is Better?
Polyurethane is available on two bases, including oil and water-based. However, the homeowners get into the debate about which one is better, oil-based or water-based polyurethane. Though, which sealant types will work better absolutely depends on the wood type you’re working with.
- Oil Based Polyurethane
Oil-based polyurethane is incredibly ideal for refinishing heavily used furniture and hardwood floors. It’s highly denser, durable, and can withstand constant pressure. Unlike the polycrylic or water-based poly, it can amazingly excel at high heat.
On top, it has superior water resistance, making it the perfect fit for outdoor furniture and other wooden products that are possibly exposed to moisture.
However, it needs a higher curing temperature than water-based products. The finished product tends to harden at room temperature when fully cured.
- Water-Based Polyurethane
Nowadays, water-based polyurethane gains the most common uses. The main reason is water is an effective solvent. Thus it can easily penetrate the wood layers. You’ll get an excellent sealing job from water-based polyurethane though you might apply more than three coats.
Water-based polyurethane contains pungent, aggressive organic compounds(VOCs) compared to oil-based poly. In that way, this product is less toxic and odorous on your nose and lungs. The drawback is that it has less resistance to high heat and water than oil-based poly.
Otherwise, it’s cheaper but not suitable for using heavily used workpieces. As a result, these workpieces need to be repainted after some wear and tear.
Polycrylic vs Polyurethane
| Feature | Polycrylic | Polyurethane |
|---|---|---|
| Composition | Water-based acrylic polymer | Oil-based or water-based resin |
| Finish | Clear, transparent | Clear, transparent or amber tinted |
| Odor | Minimal odor | Strong odor (especially oil-based versions) |
| Drying Time | Quick drying (2-4 hours) | Slower drying (6-8 hours or more) |
| Application | Can be applied with a brush, roller, or spray | Can be applied with a brush, roller, or spray |
| Coverage | Thinner coats, may require additional layers for durability | Thicker coats, usually provides a more durable finish |
| Yellowing | Resistant to yellowing over time | Some oil-based versions may yellow over time |
| Durability | Moderately durable, suitable for light to moderate use | Very durable, suitable for heavy-duty or high-traffic use |
| Maintenance | Easy to clean and maintain | Requires more maintenance due to potential wear and tear |
| Recoating | Can be recoated relatively easily | May require sanding before recoating for adhesion |
| Environmental | Low VOC (volatile organic compound) content | VOC content varies, may be high in oil-based versions |
One of our articles –: How To Remove Polycrylic Finish: 4 Steps To Know.
Can You Put Polyurethane Over Polycrylic?

You can put Polyurethane over Polycyclic, maintaining some conditions. Though the base is different, the polyurethane and Polycrylic may be placed over oil or water-based paints and finishes.
However, ensure you completely dry and cure the water-based polycyclic before applying polyurethane over it. Typically polycyclic takes a longer time to fix due to the additives in the paint.
Tools You’ll Need For Applying Polyurethane Over Polycrylic
Before directly jumping onto the procedure, let’s know which tools and materials you’ll need for this process. Gather them near your hand before getting into the job so that you won’t find it a hassle after.
- Oil-based or Water-based polyurethane
- 120-180 grit sandpaper
- 80-150 grit sandpaper (for refinishing job)
- Natural bristle brush for oil-based poly
- Nylon bristle brush for water-based poly
- Automotive polishing compound
- Automotive rubbing compound
- Tack cloth
- Sanding block
- Distilled water for water-based poly
- Vacuum cleaner
- Mineral spirits for oil-based poly that dries with a slight yellowish tint
How To Apply Polyurethane Over Polycrylic

Here we shared step-by-step instructions on how to apply polyurethane over polycrylic. Following these simple steps, you can easily use the polyurethane and seal it correctly in the end.
However, before you start, make sure to wear respirator protection.
Step 1: Prepare The Surface
Make sure the water-based polycrylic coating you applied is completely dry. You might want to wait 30 minutes until the polycrylic becomes dry to touch. Allow 24 hours after the final coat so that it is ultimately ready for regular use.
Step 2: Sand The Polycrylic Finish
Sanding is the most crucial part of applying the polyurethane procedure. Because sanding down rough or uneven wood helps you get a better finish and prevent warping.
Use sandpaper with 80-150 grits to lightly sand the wood. You can use sandpaper or either a power buffer. It will give a smooth, flawless finish that will make your work much more effortless.
Ensure you’re not accidentally cutting through the water-based finish. Otherwise, the polyurethane can’t grip appropriately onto the finish.
Step 3: Remove The Dust
After sanding the wood, you should remove the dust from the wood surface. In that case, a vacuum cleaner makes your job simple.
Using the suction, dust off the surface. Afterward, rinse the piece of wood well with a clean damp cloth. Let the wood dry, and it will be ready for use once dry.
Step 4: Seal The Surface
Sealing the surface helps protect the elements from water damage and keeps insects out.
There are various types of sealers available in the market. You can try polyurethane-based products, including liquid, gels, spray, or blocks.
To apply the sealer, use a specialized spray or gel-based poly in thin layers over the furniture. Next, let the seal dry and wipe down the excess poly with a tack cloth or sponge.
Step 5: Prepare To Apply The Oil Or Water Based Polyurethane
Choose a well-ventilated room or workplace where you will apply polyurethane to your furniture. Make sure to clean the dust off the room.
Purchase the best polyurethane cans. You can either pick a water-based or oil-based polyurethane as your preference.
If one can use it at full strength, oil-based polyurethane seems to be more than wiping varnish. The advantage of oil-based polyurethane is it dries quickly, and you can sand it more easily. But if you wish to use the polyurethane at half strength, you can choose water-based polyurethane
Step 6: Apply The First Coat Of Polyurethane
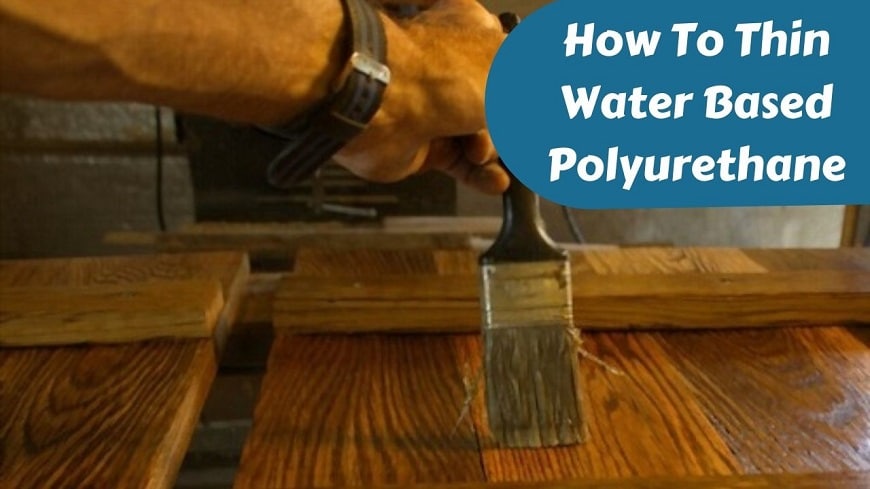
Once you are done sealing with poly, it’s time to apply the first coat of Polyurethane. For oil-based poly, use a natural bristle brush. Otherwise, use a nylon bristle brush for water-based poly.
First, apply a thin layer of poly. Make sure you spread it in long and even strokes and keep a wet edge. Plus, ensure that the strokes overlap for a uniform coat.
However, avoid coming up with drips or bumps on the workpiece. Though you get some, use a razor blade, sandpaper, or chisel to remove them.
Step 7: Wet Sand The First Coat
Once the first coat dries, now wet sand the workpiece, this process usually holds on a horizontal or vertical grain.
You can skip this process if you’re applying polyurethane to light woods. Otherwise, this procedure is best to give you more refined textures.
Step 8: Apply The Second Coat
If you want a glossy, smooth finish, you might need to apply two more coats of polyurethane to gain this finish. Follow this step after 24 to 48 hours, and remember to use long brush strokes.
Step 9: Repeat The Same Process If Needed
If you work with bare wood or don’t get the best finish you want by now, repeat steps 7 and step 8 again. If needed, you can even go for a fifth coat. Again, remember to sand the surface lightly, or you can use a steel wool pad.
Step 10: Polish The Surface
If you wet-sand the second coat, polish the surface with an automotive rubbing compound. Doing the process will create a perfect shine on all surfaces.
Use an automotive rubbing compound designed to deal with the best quality wood finish. Afterward, use a foam brush to wipe off the polish, and don’t use too much pressure while polishing off the final coat.
The oil-based polyurethane at first increases the appearance of the wood. So you might begin with oil-based polyurethane and finish with water-based polyurethane. And that’s how you can apply an oil-based or water-based polyurethane over the polycrylic finish.
Tips To Choose Sealer For Your Wood Practices
Before choosing a sealer, you need to consider which type of project you’re going to do with that sealer and whether it’ll work for your purpose. Here are some essential factors in choosing a sealer.
- High Temperature Or Moisture
Will your workpiece be much exposed to moisture or high temperature? If so, pick an oil-based polyurethane sealer.
- Light Wood Or Light Color Wood
If you’re working on light wood or sealing on light color and white painted projects, choose polycrylic. Because using oil-based polyurethane can leave a yellow tint after drying.
- Fast Drying Sealer
Use polycrylic as the sealer when you need a sealer that dries much faster.
- Hardwood Floor
If you’re doing a hardwood floor project, then oil-based polyurethane will be your best choice. This sealer provides the most durable sealing and finishes for hardwood flooring, including raw wood.
- Large Wood
For the large wooden piece, you should go for a polyurethane sealer. Because using polycyclic will be challenging to give a smooth finish over a large area and dries quickly.
- Lack Of Ventilation
If the room you’re working in is not well ventilated, consider using polycrylic. It’s less toxic than polyurethane which causes less irritation. But always try to keep good ventilation while working if possible.
- Vertical Surface
Polyurethane comes with user-friendly applications while sealing a vertical surface. That’s because polyurethane is thicker and less prone to dripping from the vertical surface.
- Easier Cleaning
If you’re not wearing hand gloves or find it a hassle to clean the sealer residue, use polycrylic as it is washable with soap and water.
- Affordable Sealer
People on a tight budget use polycrylic as it’s cheaper than polyurethane. Plus, it works well for white-painted wood.
Notes
Make sure you’re not sanding deeply into the stained wood. Otherwise, be careful about using polyacrylic, as its runny consistency makes it difficult to apply.
Tips For Working With Polyurethane
- Aware of the fundamental practices such as wearing gloves while applying and allowing air to flow down the hands.
- Avoid working in a high-temperature area or either a cold place. Because polyurethane, especially water-based, tends to shrink while exposed to extreme heat. So be careful to store it to prevent shrinkage.
- The other exclusive tip for using polyurethane is to use a smooth bristle brush. If the brush fiber is rough and scratchy on the coating, it will remove some of the colors.
- Importantly, clean the surface before work to prevent a built-up mess.
- Lastly, never shake the polyurethane can as it can open an air bubble.
Check our latest guide: Aliphatic Glue vs PVA.
Check this guide to know more: Wood Glue Vs Construction Adhesive.
Polyurethane vs Polycrylic vs Lacquer
| Feature | Polyurethane | Polycrylic | Lacquer |
|---|---|---|---|
| Composition | Oil-based or water-based resin | Water-based acrylic polymer | Solvent-based or water-based resin |
| Finish | Clear, transparent or amber tinted | Clear, transparent | Clear, transparent or colored |
| Odor | Strong odor (especially oil-based versions) | Minimal odor | Strong odor (especially solvent-based versions) |
| Drying Time | Slower drying (6-8 hours or more) | Quick drying (2-4 hours) | Rapid drying (within minutes to a few hours) |
| Application | Can be applied with a brush, roller, or spray | Can be applied with a brush, roller, or spray | Can be applied with a brush, spray, or as a pre-catalyzed |
| Coverage | Thicker coats, usually provides a more durable finish | Thinner coats, may require additional layers for durability | Thinner coats, multiple layers may be needed for durability |
| Yellowing | Some oil-based versions may yellow over time | Resistant to yellowing over time | Some versions may yellow over time |
| Durability | Very durable, suitable for heavy-duty or high-traffic use | Moderately durable, suitable for light to moderate use | Highly durable, suitable for heavy-duty or high-traffic use |
| Maintenance | Requires more maintenance due to potential wear and tear | Easy to clean and maintain | Requires regular maintenance due to potential wear and tear |
| Recoating | May require sanding before recoating for adhesion | Can be recoated relatively easily | Can be recoated relatively easily |
| Environmental | VOC content varies, may be high in oil-based versions | Low VOC (volatile organic compound) content | VOC content varies, may be high in solvent-based versions |
In Conclusion
Hopefully, you get your satisfying answer about whether you can put polyurethane over polycyclic. However, when ready to apply the polyurethane, take all essential measures and apply thin layers to the wood. Using too much polyurethane at one time can give you a cake-like look.
So that’s all for today. If you have any further questions in this regard, feel free to ask us in the comments below.
Best of luck with your happy finishing!
Related Questions
Can I put polyurethane over acrylic paint?
Yes, you can put polyurethane over acrylic paint. Applying one or two coats of polyurethane is enough to protect your paint for the long term. Make sure the paint surface is properly clean and prepared, and you're ready to apply polyurethane over any paint.
Why did my polyurethane application turn yellow?
Oil-based polyurethane usually turns yellow with time and sometimes a tinge of orange. That's because the sun's UV rays make polyurethane yellow or amber, and as time passes, they become yellow due to exposure to light.
Is polyurethane better than polycrylic?
The foundation of the polycrylic is acrylic, so it's less durable than polyurethane. You can use only polycrylic on the interior surface, such as trim, cabinets, and furniture. However, adding polyurethane over polycrylic adds more durability and adherence to the character.
Can you put oil-based polyurethane over water-based polycrylic?
Yes, you can. The only concern is that the water-based polycrylic you applied is wholly dried and cured before using polyurethane over it.
Is Polycyclic far less dangerous and toxic?
Yes, polycrylic is definitely less dangerous than polyurethane. Because Polyurethane is flammable, you should carefully store it to avoid accidental fire. In addition, Polyurethane has a higher VOC count than Polycrylic. That's why polycyclic is much better for your nose and lungs.
Can you put polycrylic over an oil-based stain?
Polycyclic can be put over oil-based stains, but you should take some precautions. Especially if the oil-based stain doesn't cure properly, the water-based poly can face adhesion problems. So first, apply dewaxed shellac to seal the oil-based paint. Once it dries, using light-scuff sand will excellently prepare the surface for a better grip of the poly.
Can you put lacquer over polycrylic?
Putting lacquer over polycrylic is too risky as the solvent in lacquer is very aggressive and isn't suitable for waterborne finishes. Though if you can't but have to use lacquer over polycyclic, striping the polycrylic will be wise.


