Having nail holes, screw holes, or cracks in the wood surface is frustrating. Because they won’t let you paint your wood properly.
So, how to fill screw holes in wood before painting?
There are three methods you can use to fill your screw holes. In the first method, you can use fillers to fill the screw hole. In the second one you can use wood plugs. Lastly, you can make your own DIY plug at home to fill the screw hole. By following any of the methods you can fill the screw holes.
We don’t think this will be enough for you. Thus, if you have some time, do read our piece. Because we’ll surely make your screw holes disappear
Let’s see what this article has to say.
- 3 Methods On How To fill Screw Holes In Wood-
- How To Fill Screw Holes In Wood
- The Fastest Way To Fill Screw Holes In New Wood
- How To Fill Screw Holes with Wood Filler
- How To Fill Screw Holes in Wood Furniture
- How To Fill Screw Holes in Wood Door
- How To Fill Screw Holes in Wood Siding
- Hide A Screw | Easy to Fill Wood Holes
- How to Apply Wood Filler to Fill Nail Holes
- How To Fill Screw Holes in Wood to Re-Screw
- How To Fill Screw Holes in Wood Cabinets
- How To Fill Screw Holes in Wood Stains
- How To Fill Screw Holes in Wood Deck
- How Do You Polyfill a Screw Hole?
- 7 Ways to Plug or Fill Pocket Holes
- How Do You Fill a Screw Hole That Is Too Big?
- What Do You Do When a Screw Won’t Hold?
- Keep these things in mind while filling Screw Holes?
- Related Questions
3 Methods On How To fill Screw Holes In Wood-
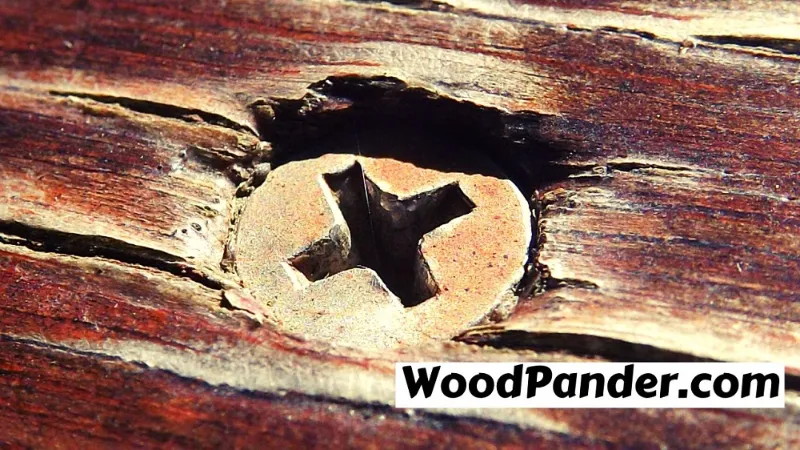
Now, these three ways are designed in a way that you can quickly grasp them. Thus, let’s not wait any longer and read these methods-
Methods 1: Fill The Screw Holes With Wood Fillers
The first method is the most commonly used for filling screw holes. Because it’s pretty easy. For this method, you have to follow the below-stated steps-
Step 1: Begin Using The Wood Fillers
First, use enough wood filler into the hole to slightly overfill it. Because fillers shrink as they dry. Now, after applying wood filler, simply turn your putty knife on its side. Then, using the edge of the blade, scrape off the extra wood fillers.
Smooth it down with the flat section of the blade until it’s level. The smoothed wood filler should ideally sit just above the wood’s surface.
Step 2: Allow The Wood Filler To Dry Before Proceeding.
Now, allow at least 30-60 minutes for the wood filler to dry. While the filler is drying, avoid touching it. This could smear or create significant problems in the still-wet compound.
Most wood fillers are designed to harden in about an hour. But drying times vary depending on the substance.
Step 3: Sand The Filled Screw Holes
Use fine-grit sandpaper to smooth the filled hole and the surrounding wood. Also, use sandpaper on any rough edges.
Sand down any rough edges surrounding the screw hole. Apply mild pressure to the sandpaper as you move it over the screw hole.
Additionally, you can accomplish this task with a high-powered orbital sander or sanding block.
The sandpaper will aid in the removal of loose chunks, splinters, and other imperfections. A grit of 100 to 120 sandpaper will provide the ideal blend of abrasion and smoothness.
You can follow this method as it’s easy and less time-consuming.
See Also: How To Flatten Warped Wood Table Top.
Method 2: Wooden Plugs For Screw Holes
A wood plug is simply a slightly tapered circular peg that is inserted in a pre-drilled hole. The plug is glued in place. And the wood grain of the plug is oriented in the same direction.
In this method, wood plugs are used to fill the screw holes. The method is shown below-
Step 1 of 2: Cutting The Wood Plugs
Cutting the plugs requires the use of a plug cutter suitable for the purpose. You can cut your plugs with a drill or a drill press. A drill press provides greater accuracy and control, although a drill will also work.
Step 2 of 2: Dill Into The Wood
Drill a ½ inch deep hole in the wood to be plugged. Drill straight into the wood and maintain the drill bit perpendicular to it.
Step 3 of 3: Install The Plugs
Now, apply some wood glue around the plug’s edge and insert it into the screw hole. Make sure your plug grain matches the wood grain of the material being plugged.
You can also use darker wood to highlight the plugs. That will create an interesting contrast look in their installation.
They are available in a variety of designs and colours. This is to mimic the appearance of various wood finishes, such as pine, oak, and maple.
Method 3: Use Homemade Or DIY Plugs
Now, if you don’t want to spend money on plugs, make it on your own. This method is a homemade solution-
Step 1 of 2: Make The Plug By Yourself
Make your own DIY plugs with wooden dowels or plug cutters in this step. Look around for a scrap piece of wood with a finish similar to your surface. Then cut it with the plug cutter and give it the shape of a plug.
Step 2 of 2: Install The DIY Plug
Then use a drill press to make a hole on the previous screw hole. Make the new hole similar to the size of the plug. Then hammer the DIY plug in the screw hole.
Alternatively, you can use a regular wooden dowel and cut it so that it is just long enough to go into the screw hole.
These are the methods you can follow before painting any wood. We broke down the whole process into methods and steps. So, hopefully, you liked it.
Method 4: Candle wax
Using candle wax is a simple and effective method for filling screw holes in wood. Here’s a step-by-step guide:
Step One: Choose a candle that matches the color of your wood.
Step Two: Light the candle and allow the wax to melt slightly.
Step Three: Hold the candle over the screw hole and let the melted wax drip into the hole.
Step Four: Fill the hole completely with the melted wax, ensuring it is level with the surface of the wood.
Step Five: Allow the wax to cool and harden.
Using candle wax provides a quick and easy solution for filling screw holes in wood. It is especially useful for small holes and can be easily customized to match the color of your wood.
How To Fill Screw Holes In Wood
Method 1: Fill the Hole with Spackling Paste
Apply the Spackling Paste:
To fill the hole with spackling paste, start by applying the paste directly into the screw hole using a putty knife. Make sure to fill the hole completely and level it with the surface of the wood. Once applied, let the spackling paste dry according to the manufacturer’s instructions.
Let It Dry:
This usually takes a few hours. After it has dried, sand the area lightly to smooth out any rough edges. The spackling paste provides a quick and easy solution for filling screw holes in wood.
Method 2: Use a Resin-Based Filler
To fill screw holes in wood, another effective method is to use a resin-based filler. This type of filler is durable and provides a strong bond with the wood. Here’s how you can use a resin-based filler to fill screw holes:
Step One: Squeeze Some Filler into a Bowl
Start by squeezing a small amount of resin-based filler into a bowl. Make sure to use an appropriate amount based on the size of the screw hole you need to fill.
Step Two: Apply the Filler
Using a putty knife or a similar tool, apply the resin-based filler directly into the screw hole. Make sure to fill the hole completely, ensuring that the filler is level with the surface of the wood. Smooth out the filler with the putty knife to create a seamless finish.
Step Three: Let It Dry
Allow the resin-based filler to dry according to the manufacturer’s instructions. This usually takes a few hours. Once the filler is completely dry, you can sand the area lightly to achieve a smooth and even surface.
Using a resin-based filler provides a reliable solution for filling screw holes in wood. Its strong bond and durability ensure that the filled holes will hold up well over time.
Method 3: Use a Silicone-Based Filler
To fill screw holes in wood, another effective method is to use a silicone-based filler. This type of filler is known for its flexibility and water resistance, making it a great option for outdoor projects or areas prone to moisture. Here’s how you can use a silicone-based filler to fill screw holes:
Step One: Apply the filler directly into the screw hole, ensuring it fills the entire space. Use a putty knife or similar tool to smooth out the surface.
Step Two: Allow the filler to dry completely. This typically takes a few hours, but refer to the manufacturer’s instructions for specific drying times.
Using a silicone-based filler provides a durable and long-lasting solution for filling screw holes in wood, especially in areas exposed to moisture or temperature changes.
Method 4: Use a Putty Knife
Using a putty knife is another effective method to fill screw holes in wood. Here’s how you can use a putty knife to achieve a seamless finish:
Step One: Apply wood glue directly into the screw hole, ensuring it fills the entire space. The wood glue will provide a strong bond and prevent the filler from cracking or falling out over time.
Step Two: Allow the wood glue to dry completely. Once dry, use sandpaper to smooth out the surface, ensuring it is flush with the surrounding wood.
Using a putty knife in combination with wood glue provides a reliable and durable solution for filling screw holes in wood, ensuring a professional-looking result.
Method 5: Use Wood Putty
Using wood putty is a popular method for filling screw holes in wood. Here’s how you can effectively use wood putty to achieve a seamless finish:
Step One: Apply the wood putty directly into the screw hole, ensuring it fills the entire space. Use a putty knife or your finger to press the putty firmly into the hole.
Step Two: Allow the wood putty to dry completely. This usually takes a few hours or overnight, depending on the brand and type of putty used.
Using wood putty provides a reliable and durable solution for filling screw holes in wood, ensuring a professional-looking result. It can be easily sanded and painted over for a seamless finish.
Method 6: Use a Wood Filler
Using a wood filler is another effective method for filling screw holes in wood. Here’s how you can use a wood filler to achieve a seamless finish:
Step One: Apply the wood filler directly into the screw hole, ensuring it fills the entire space. Use a putty knife or your finger to press the filler firmly into the hole, making sure it is level with the surface of the wood.
Step Two: Allow the wood filler to dry completely. This typically takes a few hours or overnight, depending on the brand and type of filler used. Once dry, sand the filled area to smooth out any imperfections.
Using a wood filler provides a durable and long-lasting solution for filling screw holes in wood, ensuring a professional-looking result.
Method 7: Use a Resin-Based Filler
Using a resin-based filler is another effective method for filling screw holes in wood. Here’s how you can use a resin-based filler to achieve a seamless finish:
Step One: Apply the filler directly into the screw hole, ensuring it fills the entire space. Use a putty knife or your finger to press the filler firmly into the hole, making sure it is level with the surface of the wood.
Step Two: Allow the filler to dry completely. This typically takes a few hours or overnight, depending on the brand and type of filler used. Once dry, sand the filled area to smooth out any imperfections.
Using a resin-based filler provides a durable and long-lasting solution for filling screw holes in wood, ensuring a professional-looking result.
Method 8: Use a Caulking Gun
Using a caulking gun is a simple and effective method for filling screw holes in wood. Here’s how you can use a caulking gun to achieve a seamless finish:
Step One: Apply the caulk directly into the screw hole, ensuring it fills the entire space. Gently squeeze the caulking gun trigger to release the caulk, and move the gun along the hole to evenly distribute the caulk. Make sure the caulk is level with the surface of the wood.
Step Two: Allow the caulk to dry completely. This usually takes a few hours or overnight, depending on the brand and type of caulk used. Once dry, use sandpaper to smooth out any rough edges or imperfections. Sand in a circular motion until the filled area is smooth and blends in with the surrounding wood.
Step Three: Wipe away any excess caulk using a damp cloth or sponge. This will help to create a clean and polished finish. Be careful not to disturb the caulk in the hole while wiping away the excess.
Using a caulking gun provides a quick and efficient solution for filling screw holes in wood. It allows for precise application and ensures a professional-looking result. Remember to choose a caulk that matches the color of your wood for a seamless finish.
Method 9: Use Wood Putty and Sandpaper
Using wood putty and sandpaper is a popular method for filling screw holes in wood. Here’s how you can achieve a seamless finish:
Step One: Apply the wood putty to the screw hole, ensuring it fills the entire space. Allow the putty to dry completely, following the manufacturer’s instructions. Once dry, use sandpaper to smooth out any rough edges or imperfections.
Step Two: If needed, apply a second layer of wood putty or spackling paste to the hole. Again, let it dry completely and sand it down until smooth.
Step Three: Clean up any excess filler or paste using a damp cloth or sponge. This will help create a clean and polished finish.
Step Four: Apply a finishing product, such as paint or stain, to match the surrounding wood.
Using wood putty and sandpaper provides a reliable and effective solution for filling screw holes in wood. It allows for customization and ensures a professional-looking result. Remember to choose a wood putty that matches the color of your wood for a seamless finish.
The Fastest Way To Fill Screw Holes In New Wood
The fastest way to fill screw holes in new wood is by using a wood filler. Wood fillers are easy to apply and dry quickly, allowing you to complete your project in no time. They also provide a strong and durable solution for filling screw holes, ensuring a seamless finish.
How To Fill Screw Holes with Wood Filler
To fill screw holes with wood filler, follow these step-by-step instructions.
First, gather your materials: wood filler, a putty knife, and sandpaper.
Next, clean the area around the screw hole to remove any debris. Then, apply the wood filler to the hole using the putty knife, making sure to overfill slightly. Allow the filler to dry completely, usually overnight.
Once dry, use sandpaper to smooth the surface of the filler until it is flush with the surrounding wood.
Finally, wipe away any dust and apply paint or stain as desired. This method provides a seamless and professional-looking finish.
How To Fill Screw Holes in Wood Furniture
To fill screw holes in wood furniture, follow these step-by-step instructions.
First, gather your materials: wood filler, a putty knife, and sandpaper. Clean the area around the screw hole to remove any debris.
Then, apply the wood filler to the hole using the putty knife, making sure to overfill slightly. Allow the filler to dry completely, usually overnight.
Once dry, use sandpaper to smooth the surface of the filler until it is flush with the surrounding wood.
Finally, wipe away any dust and apply paint or stain as desired. This method will help restore the appearance of your wood furniture.
How To Fill Screw Holes in Wood Door
To fill screw holes in a wood door, you can use wood filler or a resin-based filler.
Start by cleaning the area around the hole and removing any debris.
Then, apply the filler using a putty knife, making sure to overfill slightly. Allow it to dry and then sand it down until it is flush with the door.
Finally, paint or stain the door as desired.
How To Fill Screw Holes in Wood Siding
To fill screw holes in wood siding, follow these step-by-step instructions.
First, clean the area around the hole to remove any dirt or debris.
Next, choose a suitable filler such as wood putty or a resin-based filler. Apply the filler to the hole using a putty knife, making sure to overfill slightly. Allow the filler to dry completely.
Once dry, sand the filled area until it is smooth and flush with the surrounding siding.
Finally, paint or stain the siding to match the rest of the surface.
This simple process will help you achieve a seamless finish on your wood siding.
Hide A Screw | Easy to Fill Wood Holes
To hide a screw and fill wood holes easily, you can use various methods.
One option is to use a wood filler, which can be applied with a putty knife and sanded down for a smooth finish.
Another option is to use a resin-based filler, which provides a strong and durable solution. Both methods can help you achieve a seamless look before painting.
How to Apply Wood Filler to Fill Nail Holes
To apply wood filler to fill nail holes, start by selecting a wood filler that matches the color of your wood. Clean the area around the nail hole and apply the filler using a putty knife. Smooth out the filler and let it dry. Sand the area to ensure a smooth finish.
How To Fill Screw Holes in Wood to Re-Screw
To fill screw holes in wood to re-screw, follow these steps.
First, apply wood putty or spackling paste to the holes, ensuring they are completely filled. Allow the filler to dry, then sand the area smooth.
Next, clean up any excess filler or paste using a putty knife or sandpaper.
Finally, apply a finishing product, such as paint or stain, to match the surrounding wood. This will help to blend the filled screw holes with the rest of the wood surface.
By following these steps, you can ensure a secure and aesthetically pleasing result when re-screwing into the wood.
How To Fill Screw Holes in Wood Cabinets
To fill screw holes in wood cabinets, follow these step-by-step instructions.
First, choose a suitable filler such as wood putty or spackling paste. Apply the filler to the holes, ensuring they are completely filled. Allow the filler to dry, then sand the area smooth.
Finally, apply a matching finish to blend the filled screw holes with the rest of the cabinet.
How To Fill Screw Holes in Wood Stains
To fill screw holes in wood stains, follow these step-by-step instructions.
First, choose a suitable filler like wood putty or spackling paste.
Apply the filler to the holes, ensuring they are completely filled. Allow the filler to dry, then sand the area smooth.
Finally, apply a matching stain to blend the filled screw holes with the rest of the wood.
How To Fill Screw Holes in Wood Deck
To fill screw holes in a wood deck, you can use a wood filler or putty specifically designed for outdoor use.
Apply the filler to the holes, making sure they are completely filled. Allow it to dry, then sand the area smooth.
Finally, apply a waterproof sealant or stain to protect the filled screw holes from moisture and weathering.
How Do You Polyfill a Screw Hole?
To polyfill a screw hole, start by cleaning the hole and removing any debris. Then, apply a small amount of polyfiller to the hole using a putty knife. Smooth it out and let it dry completely. Sand the area until it’s smooth, and then paint or stain as desired.
7 Ways to Plug or Fill Pocket Holes
There are several methods you can use to plug or fill pocket holes in wood.
One option is to use wooden dowels or plugs that match the color and grain of the wood.
Another method is to use pocket hole plugs, which are specifically designed to fit into pocket holes.
You can also fill the holes with wood filler or putty, which can be sanded and painted over for a seamless finish. Additionally, you can use epoxy or resin-based fillers for a more durable solution.
Another option is to use self-adhesive cover caps, which can be easily applied over the holes. Finally, you can use a combination of methods depending on your specific needs and preferences.
How Do You Fill a Screw Hole That Is Too Big?
If you encounter a screw hole that is too big, don’t worry, there are solutions. One option is to use wooden dowels or plugs to fill the hole.
Another method is to use a combination of wood filler and sawdust to create a custom filler. Both options can be sanded and painted over for a seamless finish.
What Do You Do When a Screw Won’t Hold?
If a screw won’t hold, there are a few things you can try. First, you can try using a larger screw to get a better grip. Another option is to use a wall anchor or toggle bolt for added support.
If the hole is stripped, you can fill it with wood filler or toothpicks coated in glue before reinserting the screw.
Keep these things in mind while filling Screw Holes?
When filling screw holes in wood, there are a few important factors to consider. First, you need to choose the right filler for the job.
There are various options available, such as spackling paste, resin-based fillers, silicone-based fillers, putty knives, wood putty, wood fillers, and caulk guns. Each filler has its own advantages and disadvantages, so it’s important to select the one that best suits your needs.
Second, make sure the screw holes are clean and free of debris before applying the filler. Use a brush or vacuum to remove any dust or loose particles. This will ensure that the filler adheres properly and provides a smooth finish.
Next, apply the filler to the screw holes using a putty knife or caulk gun, depending on the type of filler you’re using. Fill the holes completely, making sure to level the filler with the surface of the wood.
After applying the filler, allow it to dry according to the manufacturer’s instructions. Once dry, sand the filled areas gently to achieve a seamless finish. This will help the filled screw holes blend in with the surrounding wood.
Lastly, before painting, make sure to prime the filled screw holes along with the rest of the wood surface. This will ensure that the paint adheres properly and provides a uniform finish.
By keeping these things in mind, you can effectively fill screw holes in wood before painting, ensuring a professional-looking result.
One of our articles – Wood Hardener Vs Polyurethane.
Related Questions
Can I fill screw holes with caulk?
No, you can't. Caulk is good for sealing around sinks, bathtubs, and other bathroom fittings. However, caulk is not suitable for filling screw holes or other holes in wood. Because it shrinks with time and creates a divot.
Can you use wood filler on rotten wood?
Yes, to repair rotten or damaged wood, use a polyester filler. It is possible to mold and shape it to recreate the actual wood shape. It accepts paint easily and will not deteriorate.
Can you put a screw in the wood filler?
Yes, you can do that. Because it is frequently made out of wood dust and drying binder. And also diluent thinner and pigments.
Hopefully, now you have a clear idea of how to fill screw holes in wood before painting. Whatever approach you choose, the outcomes will meet your expectations.
Anyway, if you need any further assistance, let us know by commenting.
Thank you for reading, and good luck!

