2×4 is the most common piece of lumber widely used for woodworking projects. But when you’re up to bending this thick piece of wood, the problem arises as to how to do it easily.
How to bend a 2×4 wood?
Put the 2×4 wood in a steam box. Turn on the steam source and let the wood steam for 2 hours. Afterward, take out the wood and immediately bend it in the form using clamps. Wait one week to dry the wood and achieve the required curves completely.
In this article, we will go through several methods of bending a 2×4 wood along with their advantages and disadvantages. You’ll also learn here some exclusive tips to bend your wood piece successfully!
So let’s dig into the details.
Table of Contents
Can You Bend A 2×4 Wood?
Truly said, bending something the thickness of 2×4 wood is very hard. But thankfully, it’s not impossible to do. If you decide to bend a 2×4 wood, you’ve to consider some factors, including a lot of time, lots of pressure, and enough patience.
You might need to bend the wood several times to get your desired curve, depending on the radius of the curve required.
How To Bend A 2×4 Wood?
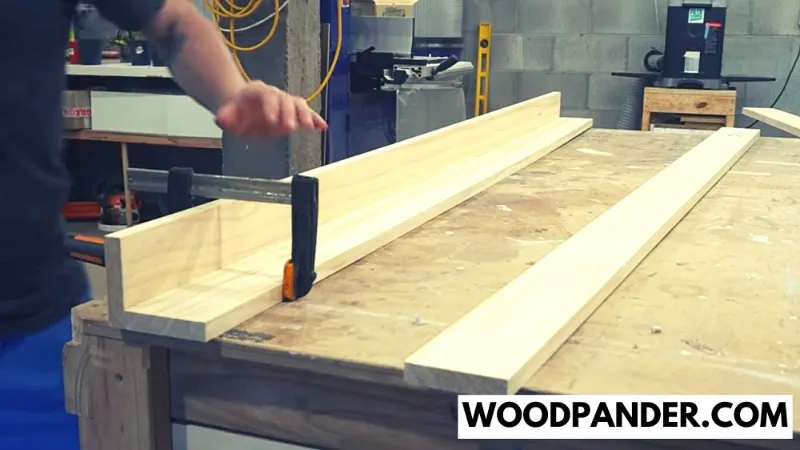
Several methods can be used to bend 2×4 wood. Generally, two methods are mostly used to bend a thick wood like 2×4 and here these are
Method 1: Slice Into Wood Veneers

Slicing the 2×4 into veneers means making thin wood slices so you can bend them easily.
Advantages
- Bending to the radius you need without breakages
- Doesn’t need a large steam box
- Size the veneers as required
- No spring back of the shape of the board is clamped.
Disadvantages
- Might sacrifice wood while making veneers
Tools You’ll Need
- Wood glue
- Utility knife
- Cutting mat (optional)
- Saw. Here I’ve talked about saw guide in details.
- Glue roller or paint brush
- Straight edge
- Clamps
Step 1: Slice The Wood
Slice the wood into thin pieces. Cut the wood strips through a straight-grained edge, not on the face grain side. It will help to put back the wood slices together with minimal interruption.
Step 2: Line The Form
With Thin Cork Liner, line the form. It helps to even out any irregularities in the sawn form.
Step 3: Glue The Wood
Apply wood glue on the wood strips using a disposable roller to dispense the glue onto the wood.
Step 4: Place The Wood Strips In The Form
After applying the wood glue, immediately put the wood strips in the form. Place another piece of glued wood on top of it. Repeat this process until you combine all the slices of your 2×4 wood. Clamp the pieces together in the form until dry.
Tips:
Before cutting the wood slices, make a diagonal line with a pencil and a ruler across the bottom. Doing so will help you to tell which order the strips belong to while rearranging the wood.
Method 2: Bend Wood With Steam
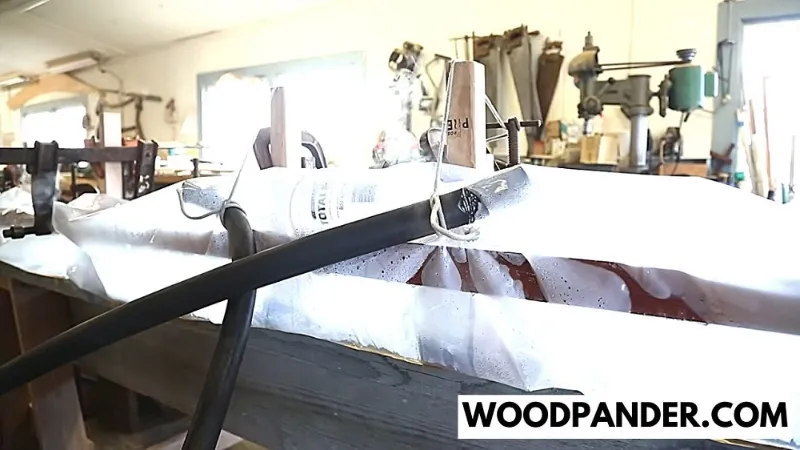
Steaming is the widely popular method to bend thick wood. Though it seems quite challenging for beginners, this method will be effective in the long run.
Advantages
- Environment friendly, no uses of chemicals
- Soften the wood all over, not only the one side
- Offers permanent bend
- No losing of woods
Disadvantages
- Building a steam box might be a hassle
- Required a lot of waiting time
- Must be formed into a frame
- Excess moisture
Things You’ll Require
- Steam box
- Steam cleaner with a hose
- Clamps (Squeeze-style)
- Pre-made forms
- Waterproof and heat-resistant gloves
Step 1: Build The Steam Box
Make a steam box with enough space to keep your 2×4 wood. It should have an opening that will allow steam pressure to escape. Otherwise, the box can explode.
Step 2: Prepare The Steam Box
Place the steam box in a garage or outdoor area where the surface will be stable and won’t damage due to excess moisture.
Step 3: Place The Wood
Insert the wood into the steam box by placing it on the shims. Close the opening lid of the steam box.
Step 4: Turn On The Steam Source
Activate the steam source and bring it to the boiling temperature. Let the moisture fill the steam box.
Step 5: Build The Frame
Create a frame to shape the wood using plywood, lumber, and clamps on a workbench.
Step, 6: Continue Steaming
The general rule of thumb is to steam wood for about an hour for every 1 inch of thickness. So, for 2×4 wood, you might need to wait two hours to steam the wood completely.
Try to maintain a constant temperature of about 100°C inside the box. Plus, you should check inside the steam source every 15 minutes to see whether it is running out of water.
Step 7: Take Out The Box From The Wood
Put on a pair of thick gloves and remove the wood piece from the steam box.
Step 8: Let The Wood Dry
Once you remove the wood from the steam box, Immediately bend it to your desired curve.
Quickly place the wood in the frame. Ensure you overbend the wood by about 5 percent, as it can bend back once it’s dry and removed from the frame.
Clamp one end of the board to the form before bending the rest. After that, add more clamps. Using a tightening strap will help to hold the wood in place. Lastly, leave the wood to dry in a ventilated space for a week.
Safety Precautions for Steam-Bending: Be careful while opening the steam box. Use heavy gloves and safety glasses to handle the process. Otherwise, your hand can get burned or injured.
Other Alternative Methods To Bend A 2×4 Wood
There are other methods you can apply to bend a 2×4 wood.
Alternative 1: Bending Wood With Hot Water
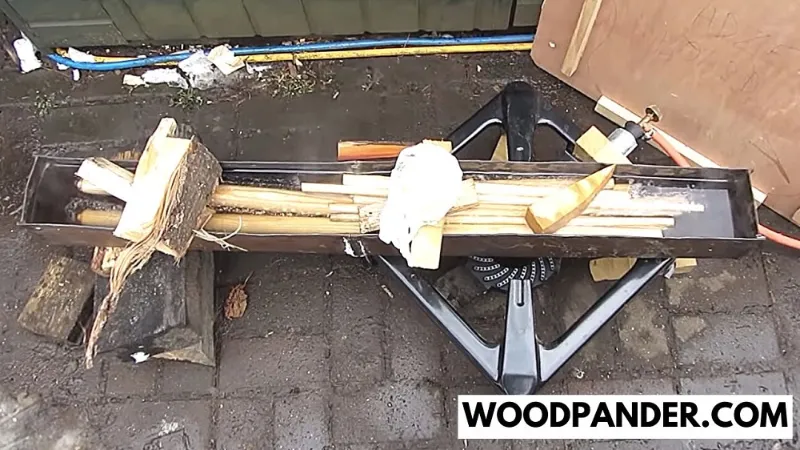
Soaking the wood in hot water until it is pliable, is another widely used formula for wood bending. It’s a good alternative to the steaming process.
Dealing with hot water might increase the risk of injury. It takes a longer time and once the wood is pliable, you should clamp it fast through a form and allow it to dry. Once it’s cool and dry, it will take the curved shape of the form.
Advantages
- Fewer materials wastes
- No need to build a steam box
- Low power consumption
Disadvantages
- Dealing with hot water can be risky
- Needs a large pot-like bathtub
Things You’ll Need To Bend Woods With Water
- A larger tub of water
- Pre-made form
- Pot for heating water
- Clamps (squeeze-style clamps will work best)
- Waterproof and heat-resistant gloves
Step 1: Put The Wood In The Tub
A bathtub is the best place for soaking the wood if it fits inside the tub. The tub will limit the mess while soaking the wood board in the water and can also handle the weight of the water necessary to soak in the wood.
Tips: Make sure to plug the drain so the hot water won’t drain.
Step 2: Heat The Water
Now heat a pot of water on the stove. The hotter the water, you can complete bending that more easily.
You will need enough hot water that can keep the wood submerged. If the wood floats at first, put a heavy rock or similar item on top of the wood so it can be submerged.
Step 3: Add Hot Water Into The Tub
Once the water is hot enough, carefully pour it into the tub. Be careful about the sudden hot water splashing while adding it to the tub.
Allow the wood piece to soak in hot water for an hour. The more the wood can soak in the hottest water, the easier your work will be.
Tips: Add hot bath water to keep the temperature up.
Step 4: Remove The Board From Tub
Use a pair of waterproof and heat-resistant hand gloves to remove the wood from hot water. As soon as you bring it out, clamp one end of the board to form and move the rest to bend it around the form, adding the clamps slowly.
Step 5: Allow The Board To Cool
Let the wood board dry and cool for a few hours clamping it to the form. Afterward, remove the clamps and allow the board to dry completely. If it becomes dry but fails to hold the shape, repeat the process and clamp the board to the form again.
Alternative-2: Bending Wood With The Kerf-cutting Method
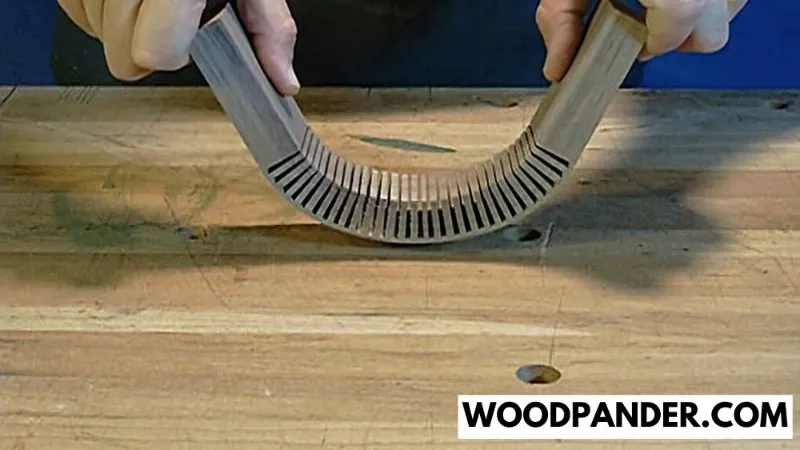
Kerf cut is the easiest method for bending the wood. This approach is best for-
- Curved trim pieces
- Where only one plane of the woods will be visible
Advantage
- Clean work
- More control
- Time-saving
- No soaking or steaming
- Thicker wood can be bend
Disadvantage
- Creating multiple cuts with perfection can be challenging
- Requires a miter saw or radial saw
- Only one side of the wood can be visible
Things You’ll Need
- Table saw, miter saw, or radial saw
- Pencil
- Kerf saw blade
- Eye and hearing protection
- Wood glue
Step 1: Adjust The Saw Blade
Adjust the saw blade’s depth of about 1/8 to 3/16 inches of material. Afterward, make the kerf cut across the board every half inch. The kerf is located inside the curve that you’re trying to bend. Ensure the kerf is not so deep; otherwise, they may break the wood.
Step 2: Outline The Range Of Cuts
Mark the span of the bend with a painter’s tape or pencil unless you’re bending the entire wood.
Step 3: Make The First Cut
Turn on the saw and run it across the 2×4 inches of wood, beginning at the one end of the bend span.
Step 4: Make Subsequent Cuts
Make subsequent cuts maintaining a distance equal to the width of the saw blade. Keep making cuts until you reach the end of the bend span.
Step-5: Bend The 2×4 Wood
Fill the kerf with wood glue. Then bend the wood into a frame and wait until the wood glue becomes dry. But remember, this trick will work best for outward wood curves rather than inward ones. If you need inward curves, build a supporting frame in the back to hold the bend.
Tip: To get the best result, keep these cuts evenly spaced. Also, the more closely you cut the kerfs, the tighter you bend the wood. So, try it on a test wood piece to determine the right spacing.
Safety Precautions for Kerf-cutting:
Be aware of all the safety requirements for working with electric saws.
Tips To Successfully Bend A 2×4 Wood
As we mentioned earlier, bending a 2×4 wood is not easy. So while bending, you need to consider the following things.
- As wood fibers are tough and rigid, they don’t want to bend and are easy to break while bending. So you have to keep patience while doing this task.
- While bending wood with hot water or steam, keep the form available near you so you can quickly clamp the pliable board before it gets cool or dry.
- While using a steam method to bend the wood, use air-dried lumber, as its flexible lignin is softened by steam and allows the fibers and cells to bend without tearing.
- Try to use oak, beech, or pine, as they are very good for bending.
Related Questions
Does Vinegar Help Bend Wood?
Yes, vinegar’s properties are easily soaked into the wood fibers and make them saturated. As a result, the wood becomes much softer to bend. So you can easily bend wood using vinegar.
Does Bending Wood Weaken It?
Yes, bending wood can slightly make it weak and leave some residual stresses, which causes breakage and spring-back over time. In that case, you must be careful and patient to bend the wood without putting much pressure on it.
How do you bend 2×4 wood?
To bend a 2×4, you need to first soften the wood fibers with steam or hot water and then clamp it in a bending jig until it dries.
What is the easiest way to bend wood?
The easiest way to bend wood is to use thin strips of wood and laminate them together to form a curved shape.
Can you Kerf bend a 2×4?
It is possible to Kerf bend a 2×4, but it requires multiple cuts and can weaken the wood.
Can you bend thick wood?
Yes, thick wood can be bent, but it may require more time, effort, and equipment.
What is the bending strength of a 2×4?
The bending strength of a 2×4 varies depending on the type of wood and its moisture content, but it can typically withstand moderate bending forces.
How do you cut a curve in a 2×4?
To cut a curve in a 2×4, you can use a jigsaw or band saw to carefully follow the desired curve.
In Conclusion
By now, you already know how to bend a 2×4 wood. Hopefully, this complete guide will help you to handle your thick wood easily and bend it exactly as you want.
If you find this article helpful, Share it with your friends and family. Also, share your experience or any inquiries below in the comment section.
Best of luck!


