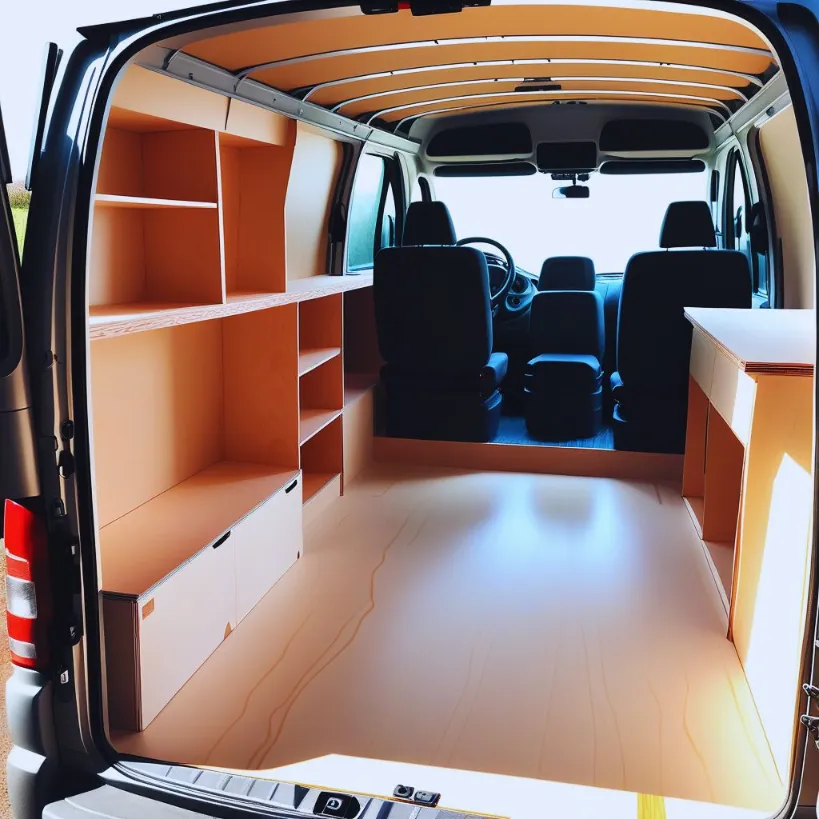
Ply lining is an essential step in optimizing your work van for efficiency and durability. By adding a protective layer to the interior walls, you can safeguard your van against dents, scratches, and general wear and tear.
Additionally, ply lining provides a smooth surface that makes it easier to load and unload cargo, reducing the risk of damage to your tools and equipment.
With the right materials and tools, you can easily attach ply lining to your van and enjoy the benefits it offers. In this article, we will guide you through the process, step by step.
- What Type of Ply Lining Do I Need For A Work Van?
- How to Attach Ply Lining to a Van?
- Conclusion
- Related Questions
What Type of Ply Lining Do I Need For A Work Van?
To ensure the success of your ply lining project, it is crucial to choose the right type of ply lining for your work van. The type of ply lining you need will depend on the specific requirements of your van and the nature of your work.
One popular option is to use plywood sheets that are specifically designed for van interiors. These sheets are typically made from high-quality, durable materials that can withstand the demands of daily use. They come in various thicknesses, so you can choose the one that best suits your needs.
Another consideration is the adhesive or sealant you will use to attach the ply lining to the van walls. It is important to select a strong and reliable adhesive that is specifically formulated for this purpose. This will ensure that the ply lining stays securely in place, even when subjected to vibrations and movement during transportation.
Additionally, you will need to gather the necessary tools for the installation process.
These may include a measuring tape to accurately measure the dimensions of your van, a circular saw or jigsaw to cut the plywood sheets to size, a screwdriver or drill to secure the ply lining to the walls, sandpaper to smooth any rough edges, and safety equipment such as gloves and goggles to protect yourself during the installation process.
By carefully considering the type of ply lining, adhesive, and tools you need, you can ensure that your work van is properly protected and optimized for your specific needs.
Materials and Tools
Plywood Sheets: Choose high-quality plywood sheets specifically designed for van interiors. These durable sheets come in various thicknesses to suit your needs.
Adhesive/Sealant: Select a strong and reliable adhesive formulated for attaching ply lining to van walls. This ensures a secure bond even during transportation.
Measuring Tape: Use a measuring tape to accurately measure the dimensions of your van for precise ply lining installation.
Circular Saw or Jigsaw: Cut the plywood sheets to size using a circular saw or jigsaw for a perfect fit.
Screwdriver/Drill: Secure the ply lining to the van walls using a screwdriver or drill.
Sandpaper: Smooth any rough edges on the plywood sheets with sandpaper for a professional finish.
Safety Equipment (gloves, goggles): Protect yourself during the installation process by wearing gloves and goggles. Safety first!
How to Attach Ply Lining to a Van?
Step 1: Preparation
To ensure a successful ply lining installation in your van, proper preparation is essential. This step sets the foundation for a smooth and efficient installation process.
Clearing the Van Interior:
Before starting the installation, remove any existing items or debris from the van interior. This will provide a clean and clear workspace for the installation process.
Measuring and Marking Key Areas:
Use a measuring tape to accurately measure the key areas of your van, such as the walls and floor. Mark these measurements on the plywood sheets to guide your cutting process later on.
Preparing Plywood Sheets:
Once you have the measurements marked, it’s time to prepare the plywood sheets. Use a circular saw or jigsaw to cut the sheets to the desired size. Smooth any rough edges with sandpaper for a professional finish.
By taking the time to properly prepare the van interior and plywood sheets, you’ll ensure a precise and efficient installation process. This will result in a high-quality ply lining that meets your needs.
Step 2: Applying Adhesive
Once you have prepared the van interior and plywood sheets, the next step in attaching ply lining to a van is applying adhesive. This crucial step ensures a strong and secure bond between the plywood and the van walls.
Choosing the Right Adhesive:
When it comes to choosing the adhesive for your ply lining installation, it’s important to select a high-quality adhesive that is specifically designed for bonding wood to metal surfaces.
Look for adhesives that are waterproof and provide a strong bond. Additionally, consider using an adhesive that is easy to apply and dries clear for a clean finish.
Applying Adhesive to the Van Interior:
To apply the adhesive, start by applying a thin, even layer to the van interior using a paint roller or brush.
Make sure to cover the entire surface area where the plywood will be attached. Pay special attention to the edges and corners, as these areas require extra adhesive for a secure bond.
Once the adhesive is applied, carefully position the plywood sheets onto the van walls, pressing firmly to ensure proper adhesion. Use clamps or weights to hold the plywood in place while the adhesive dries.
Follow the manufacturer’s instructions for drying time, as it may vary depending on the adhesive used.
Step 3: Attaching Plywood Panels
To ensure a secure and professional ply lining installation in your van, it’s important to follow the proper steps for attaching plywood panels.
This section will guide you through the process, starting from the floor and working up the walls, while also addressing the importance of overlapping joints for a seamless fit.
Starting from the Floor:
Begin by positioning the first plywood panel on the van floor, ensuring it is aligned properly. Use a tape measure to measure and mark the panel to fit around any obstacles such as wheel arches or fixtures.
Once marked, use a jigsaw or circular saw to make accurate cuts. Next, secure the panel to the van floor using van ply lining screws.
These screws are specifically designed for this purpose and provide a strong and secure attachment. Place the screws along the edges and corners of the panel, ensuring they are evenly spaced for maximum stability.
Working Up the Walls:
Once the floor panels are securely in place, it’s time to work up the walls. Measure and cut the plywood panels to fit the height of the van walls, taking into account any windows or doors. Use the same technique as before, marking and cutting the panels accurately.
To attach the panels to the walls, use the same van ply lining screws. Start at the bottom and work your way up, ensuring each panel is aligned properly and securely attached. Use a level to check for straightness and adjust as necessary.
Overlapping Joints for Seamless Fit:
To achieve a seamless fit and enhance the overall strength of the ply lining, it’s important to overlap the joints between the plywood panels. This will create a stronger bond and prevent any gaps or weak points.
When overlapping the joints, apply adhesive to both surfaces before pressing them together. This will ensure a strong and secure bond. Use clamps or weights to hold the panels in place while the adhesive dries.
Step 4: Cutting Plywood for Custom Fits
Measuring and Marking for Cuts:
Before cutting the plywood for custom fits in your van, it’s crucial to take accurate measurements and mark the panels accordingly.
Start by measuring the area where the plywood needs to be installed, considering any obstacles such as wheel arches or fixtures. Use a tape measure to ensure precise measurements and mark the plywood panels accordingly.
By taking the time to measure and mark the plywood accurately, you can ensure a seamless and professional fit in your van. This will not only enhance the overall appearance but also maximize the functionality of the ply lining.
Using Circular Saw or Jigsaw for Precision:
Once the plywood panels are marked, it’s time to cut them to the desired size and shape. Depending on your preference and the complexity of the cuts, you can use either a circular saw or a jigsaw.
A circular saw is ideal for straight cuts, providing clean and precise edges. Ensure that the blade is sharp and set to the appropriate depth for the thickness of the plywood. Use a straight edge or guide to ensure straight cuts along the marked lines.
On the other hand, a jigsaw is perfect for curved or intricate cuts. It allows for more flexibility and maneuverability, making it easier to follow curved lines or cut around obstacles. Take your time and use a steady hand to achieve accurate and smooth cuts.
By using the right cutting tool and technique, you can achieve custom fits that perfectly match the contours of your van. This will result in a professional and tailored ply lining installation that meets your specific needs.
Step 5: Securing Plywood Panels
Choosing the Right Screws:
When it comes to securing plywood panels in your van, choosing the right screws is crucial for a secure and long-lasting attachment. Opt for screws that are specifically designed for use with plywood and van walls.
These screws should be corrosion-resistant to withstand the elements and have a strong grip to prevent loosening over time. Additionally, consider the length of the screws to ensure they penetrate both the plywood and the van walls securely.
Creating a Secure Attachment :
To create a secure attachment, start by pre-drilling pilot holes in the plywood panels at regular intervals.
This will prevent the wood from splitting when the screws are inserted. Then, align the panels with the marked positions in your van and use a screwdriver or drill to drive the screws through the pilot holes and into the van walls.
Make sure to tighten the screws firmly, but be careful not to overtighten and damage the plywood or van walls.
By choosing the right screws and creating a secure attachment, you can ensure that the plywood panels are firmly in place, providing a sturdy and reliable ply lining for your van.
Step 6: Finishing Touches
To achieve a professional and polished look for your van’s ply lining, there are a few finishing touches you can add. These final steps will not only enhance the appearance of the ply lining but also improve its functionality and durability.
Sanding Edges for a Smooth Finish:
After attaching the plywood panels, it’s important to sand the edges to create a smooth finish.
This will not only give the ply lining a more refined look but also prevent any splinters or rough edges that could potentially cause injury. Use a fine-grit sandpaper to gently sand the edges, ensuring that they are even and free from any imperfections.
Sealing Gaps and Joints:
To ensure a tight and secure fit, it’s essential to seal any gaps or joints between the plywood panels. This will prevent moisture, dust, and debris from entering and potentially damaging the interior of your van.
Use a high-quality sealant or caulk to fill in any gaps or joints, ensuring a watertight seal. Pay special attention to areas where the panels meet the van walls or where multiple panels join together.
Adding Trim for a Professional Look:
To give your ply lining a professional and finished appearance, consider adding trim along the edges and corners.
Trim not only provides a clean and polished look but also helps to protect the edges of the plywood from wear and tear.
Choose trim that is suitable for the interior of your van and secure it in place using adhesive or small nails.
Step 7: Tips and Tricks
Ensuring Proper Ventilation:
Proper ventilation is crucial when attaching ply lining to a van. This helps to prevent moisture buildup and potential damage to the interior.
To ensure proper ventilation, consider installing vents or air vents in strategic locations. These vents will allow air to circulate and prevent condensation. Additionally, you can also leave small gaps between the plywood panels to promote airflow.
Using Spacers for Floor Panels:
When attaching floor panels, using spacers is a helpful tip. Spacers will create a small gap between the floor and the van’s metal surface.
This gap allows for air circulation and prevents moisture buildup. Use small wooden blocks or plastic spacers to create the necessary gap and ensure a long-lasting and moisture-resistant ply lining.
Working with Angles and Corners:
Working with angles and corners can be challenging when attaching ply lining.
To ensure a precise fit, measure and cut the plywood panels carefully. Use a jigsaw or circular saw to make accurate cuts.
Additionally, consider using corner brackets or L-shaped brackets to reinforce the corners and provide extra stability.
Step 8: Safety Considerations
When attaching ply lining to a van, it’s important to prioritize safety. Here are some key safety considerations to keep in mind throughout the process.
Using Safety Equipment:
Before you begin, make sure to wear appropriate safety equipment such as safety goggles, gloves, and a dust mask.
This will protect you from any potential hazards or debris that may arise during the installation.
Working in a Well-Ventilated Area:
Ensure that you are working in a well-ventilated area to prevent the buildup of fumes or dust. Open windows or use fans to promote air circulation and maintain a safe working environment.
Taking Precautions with Power Tools:
When using power tools, exercise caution and follow the manufacturer’s instructions. Always wear protective gear and keep your hands and fingers away from the cutting area. Additionally, unplug power tools when not in use to avoid accidental activation.
By following these safety considerations, you can minimize the risk of accidents and injuries while attaching ply lining to your van. Remember, safety should always be a top priority in any DIY project
Step 9: Maintenance and Repairs
To ensure the longevity and functionality of your ply lining, regular maintenance and repairs are essential. Here are some key steps to follow:
Checking for Loose Panels:
Periodically inspect your van’s ply lining for any loose panels. Gently tap each panel to check for any signs of movement or rattling.
If you notice any loose panels, secure them by using van ply lining screws. This will prevent further damage and maintain the structural integrity of the lining.
Reapplying Sealant as Needed:
Over time, the sealant used to attach the ply lining may deteriorate or become damaged. Inspect the seams and edges of the lining for any signs of wear or gaps.
If necessary, remove the old sealant and reapply a fresh layer to ensure a watertight seal. This will prevent moisture from seeping into the van and causing damage.
Addressing Wear and Tear:
Regularly assess the condition of your ply lining for any signs of wear and tear. This includes checking for scratches, dents, or punctures.
If you notice any damage, repair it promptly to prevent further deterioration. Use appropriate materials, such as plywood patches or filler, to fix any imperfections.
Remember to prioritize safety throughout the maintenance and repair process, following the safety considerations outlined in Step 8. With proper care and attention, your ply lining will continue to serve its purpose effectively.
Conclusion
To conclude, attaching ply lining to a van is a straightforward process that requires proper preparation, adhesive application, and securing of plywood panels.
By following the steps outlined in this article, you can ensure a durable and functional ply lining for your work van. Remember to prioritize safety and regular maintenance to prolong the lifespan of your ply lining.


